The Poofy Dress

the2Bpoufy2Bdress-1.jpg

So, it is November and I still have not finished blogging about the girls' Easter dresses. The thing about the navy and white theme this year is that they are so versatile. It just looks classy for any season.

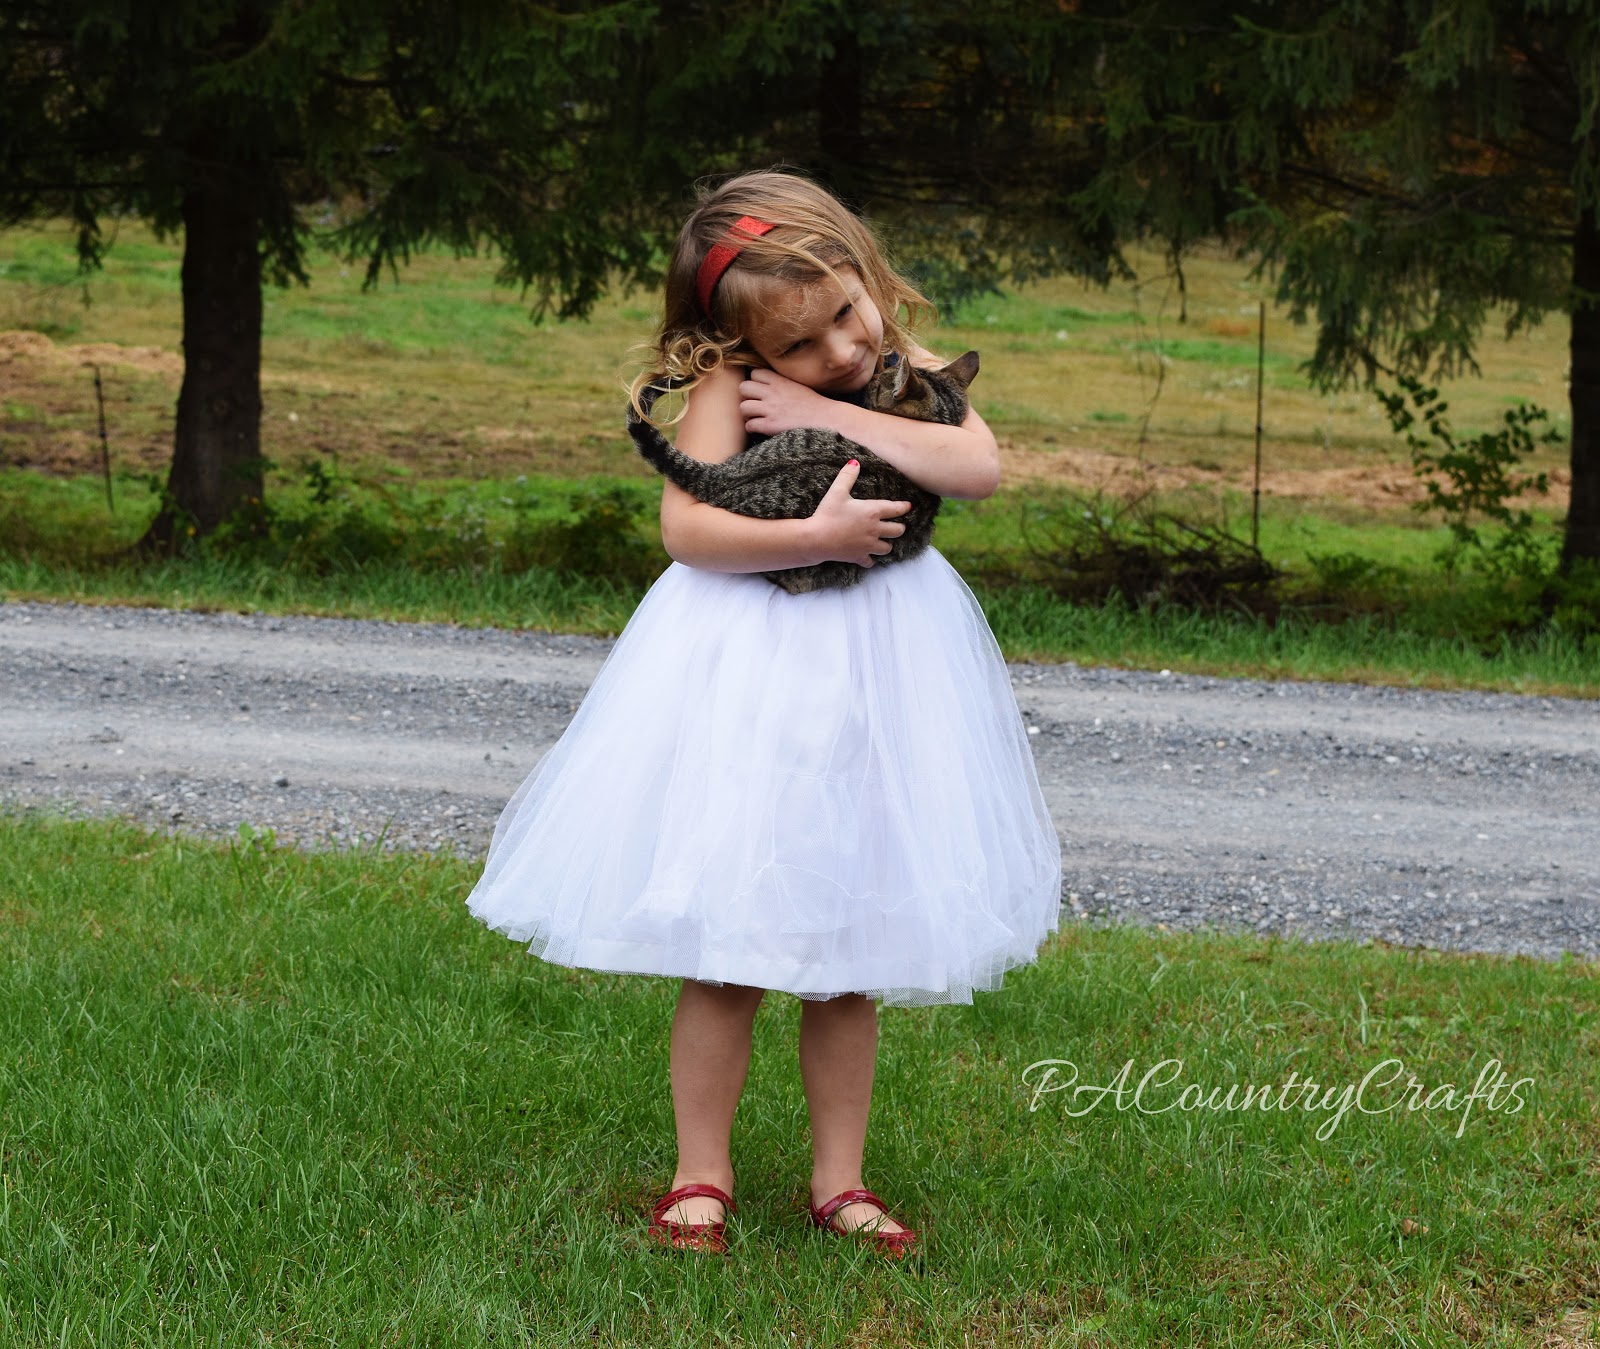
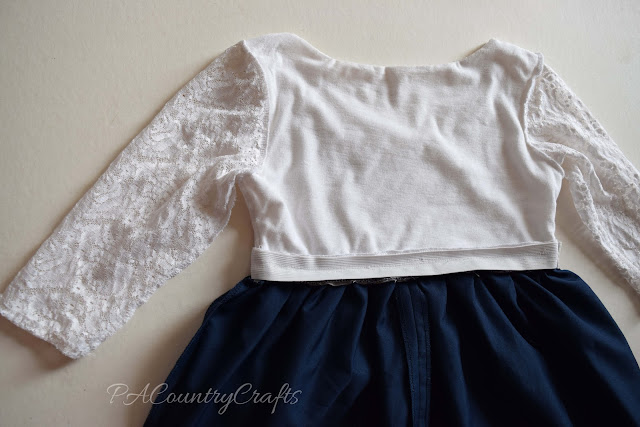
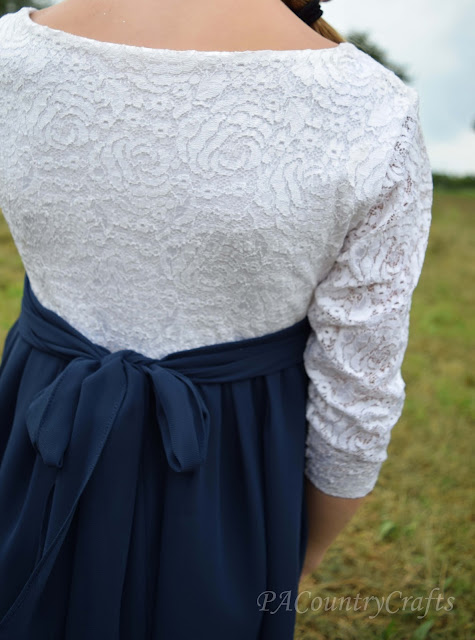
This dress turned out so beautiful and - even if the pictures don't show it by her refusal to smile - she loves it! I made a sparkly satin bodice (remnant from Joann's) using The Party Dress free pattern from Cottage Mama. I adjusted it to use buttonholes in the back, though.

The skirt is about 3 yards of shimmer tulle that was cut into strips the desired length, sewn together to make one very long piece, and gathered tightly to fit the bodice. I added a lining with a built in petticoat for a little more "poof" at the bottom. Gathering the tulle was very tedious, but definitely worth it. She calls it her "poofy dress."

The other reason I have not blogged about this dress is because within minutes of putting it on Easter morning, she went up the steps and stepped on it, ripping out a chunk of tulle from the front. I sewed it back together, but it is still visible. It just about broke my heart.

I have been meaning to fix it, but just haven't gotten around to it because I know it is going to be a huge pain in the behind. In the meantime, I have relaxed a bit and if she wants to wear it "just because" that is OK with me. You probably would not have even noticed it before I mentioned it, but now you can't unsee it. Right?
However, she loves it and wears it often. I might get around to fixing it in time for her younger sister to wear it as a hand me down. My mending pile is very neglected. Does anyone else that sews have that problem?
Link Parties where I sometimes hang out...

Lace Overlay High Low Dress

navy2Band2Bwhite2Blace2Bgirls2Bdress.jpg

I should be getting ready for Halloween, but I am procrastinating. Instead, I am backtracking and blogging about another Easter dress.

This was one of the dresses that was completely dictated by my daughter's preferences. It also ended up costing me nothing to make! So, we both won.

The navy lining, made from another layer of my old bridesmaid dress, stops above her knees and the high-low lace overlay is much longer. It is a basic, gathered skirt, but I cut the hem in a curve.

A friend gave me this beautiful lace to work with- it is a heavier, stretch lace, but I didn't use the stretch factor in the design. I just drafted a basic bodice pattern and cut the lace. I left the shoulders and top of the bodice unlined for a sheer lace effect. So, I pieced the unlined and lined portions together and overlocked the inside seam. Then, I used some vintage navy bias tape around the neck and arms. Using wash-away wonder tape was key for holding that in place to sew. The back has an invisible zipper (which I already had from changing my mind last year and using buttons).

One thing I loved about these navy and white dresses is how fun they are to pair with contrasting accessories. The box dress has a yellow tie, the lace and chiffon dress was paired with an aqua statement necklace when she wore it on Easter, and this dress is fun with pink contrasting shoes. It looked a little better back at Easter vs. the fall when I did the photo shoot, but I had put all of her white shoes away (as per the Labor Day rule) and told her to put these on. It is still fun.
Two more dresses to go, but first, I need to finish an Elsa cape. Happy Halloween!

Link Parties where I sometimes hang out...

Upcycled Bridesmaid Dress ~ An Uptown/Downtown Dress Pattern Hack

walking2Bgirls.jpg

The next Easter dress I made cost me absolutely NOTHING to make! Sweet!

Does anyone else save old bridesmaid dresses? I am pretty sure I am not the only one. I mean, you spend a ridiculous amount of money on them so it seems a shame to throw them in the donation bin. Even if you HATED the dress! (Sorry, Sis!) It wasn't an UGLY dress. It just wasn't flattering on me. (I have wide ribs.) Then, they ordered the wrong size and my other sister and I got in a big fight when she made a joke about mine not fitting. I really just hated everything about this dress. So, naturally, I hung it in my closet for 6+ years where I could see it every day.

Well, now it is not in my closet. Now, it looks like this:

The rest of it has been transformed to create several of this years' Easter dresses including this one.

The bottom of the dress is made from the top two layers of the bottom of the bridesmaid dress. The sash is made using the strap from one side. The hardest part of making this dress was cutting the slippery, chiffon fabric to make it straight. The full skirt with lightweight fabrics makes for lovely twirling, though. The twirl factor is always appreciated by the girls.

Isabelle drew me a picture of the dress she wanted. The sleeves were such an issue of contention between us. I didn't want to make long, 3/4 length sleeves from sheer lace. I really don't like to do sleeves. I ended up making the top out of some stretch lace from a friend and an old white T shirt. 

I used the

Uptown Downtown dress pattern

 to create the bodice.

It was actually very easy!

 The pattern is on sale right now. I know, I usually talk about how I hate patterns, but

this one

has so many variations and it is so versatile that it is worth it. I am not being compensated in any way for this endorsement.

Directions were included for a lace overlay version, which is mostly what I used. I just altered it to let the sleeves unlined. I hemmed the sleeves by hand sewing them. 

There was no hemming required around the neckline because of the lining.

The trick to this dress was attaching the bodice to the skirt. I wanted to maintain the stretch of the fabrics so that it would easily slip over her head. So, I got some 1" elastic from my stash, sewed it in a loop and made Isabelle try the loop on to be sure the elastic would stretch enough to get the dress on. Then, I sewed each piece -top and bottom- to the elastic. Here is what the inside of the dress looks like.

One of the shoulder straps from the bridesmaid dress was converted to a sash to tie around the waist. 

Now I have one less bridesmaid dress in my closet and my daughter has a lovely dress! Win win! 

I used more of the bridesmaid dress on the next Easter dress I made, but we haven't had a "real" photo shoot yet. Right now I am super busy canning tomatoes and chasing the last bit of summer. So, when I get around to it I will show you that one, too. :)

Elastic Waist Doll Dress Pattern

elastic-waist-peasant-doll-dress-1.jpg

Happy World Doll Day! In honor of this day, I would like to encourage you to use up some of that scrap fabric (I have WAY too much!) and make some doll clothes for organizations that donate dolls to children who could use a little joy in their lives. Here are some that I have found- some accept clothing donations and some do not but you may be able to help in some way or be inspired to start your own organization:

The Broken Doll - restores dolls and gives them to girls in foster care and hospitals
Broken Dolls Healing Hearts - creates care packages for children, including restored dolls
Hope Through Broken Dolls
Janie's Dollys for Recovery - dolls for girls undergoing extensive medical procedures

If you know of others, please share the info!

To get you started, I have a free doll dress pattern and tutorial for you today! This is a doll-sized version of the teen peasant dress from yesterday.

This really isn't too hard. I whipped this one up in about a half hour. It will fit an 18" doll like American Girl, Our Generation, or My Life. It would probably work for smaller dolls with some adjustments on the elastic length.

UPDATE 11/2019 - I now have a printable pdf pattern and step by step tutorial posted on the blog! See it HERE.

I am still working on the pdf pattern (which means it is burried on my sewing table somewhere) but you can cut these pieces with measurements.

Sleeves: 7" wide by 4 1/2" high
Tops: 8" wide by 5 1/2" high
Arm Scythes: 1 1/2" wide by 3" high (just curve it a little as shown)
Skirt: 7 1/2" high, 8" at waist, 14" at bottom (make initial slit 1" deep)
Waist elastic: 12" (1/4")
Neck elastic: 8 1/2" (1/4")

The sewing process is the same as the teen peasant dress (see THIS post for instructions!) The only differences are that I used a smaller seam allowance- 1/4" and made the elastic casings a tiny bit smaller. Also, it would probably be easier to hem the sleeves before sewing the sides.

It is really very straightforward. Just follow the same directions I gave HERE.

If you want to make puffy sleeves with elastic casings, increase the width to 9" and the height to 5".

Please use this pattern for personal, non-commercial, or charity use only. If you make one or more of these I would love to see it! You can contact me via facebook or email pacountrycrafts at gmail dot com.

I have other free doll clothing patterns available, too! They are all made to fit 18" American girl dolls. You can see them all under my tutorials menu, but here is a sampling: