

Easy Doll Maxi Skirt Tutorial
/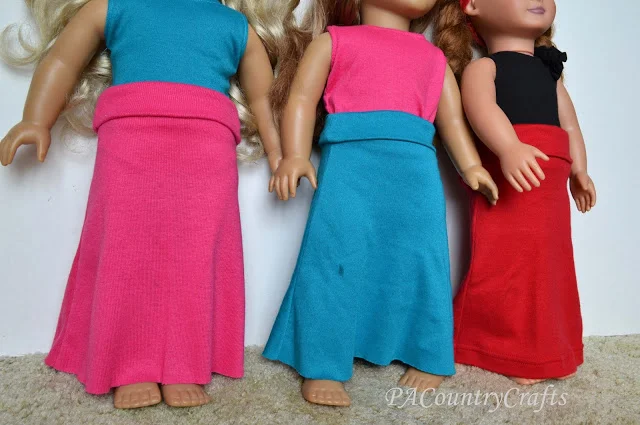
Make a doll maxi skirt with these simple tutorial. You can make a whole bunch of these from old t-shirts or knit scraps. It has a foldover yoga waistband.
Read MoreMake a doll maxi skirt with these simple tutorial. You can make a whole bunch of these from old t-shirts or knit scraps. It has a foldover yoga waistband.
Read More
Please excuse my modeling skills in the following pictures. :)


My gray skirt was made using THIS tutorial like the skirt I made HERE, but I extended it to maxi length. So comfy and I can wear the waistband over the large belly or folded down. I think the girls' skirts look better, though.


I have JUST enough left over that I think I am going to make a skirt for one of the girls. However, I love the detail on this shirt (Thank you, Loni!) and I am considering trying to make a similar design on the knit using a bleach pen. Do you think it will work?
I am linking up at the brand new Project Sewn and The SewOff Flickr Pool and Make for Mom.

My skirt is the last in the series… I wanted and A-line, and I loved the contrast of plain white against the fabric in the other skirts, so I wanted to trim with white.
.jpg)
Then I marked the length on the diagonal and made it curve gently from the bottom to the mark on the diagonal. Using this pattern, I cut two pieces on the fold from my skirt fabric.
For the white waistbands, I measured my waist (ICK!) and divided it in half again. I added seam allowances and cut four pieces in this length by 2 inches wide. I sewed two of them together along the long, top side and pressed them with the seam inside and repeated this with the other 2 pieces. Each waistband piece was then sewed to the top of a skirt half and the edges overlocked. I sewed the skirt halves together on the right side the whole way, and up to 6 inches from the top on the left side and overlocked again.. I put an invisible zipper in the left side and hooks on the top at the waistband..jpg)
.jpg)
.jpg)
.jpg)
Sewing, crafts, tutorials, recipes, and a little look at our life in the country - raising half a dozen children.

Hi! Thanks so much for stopping by! My name is Lindsay and on this blog you will find sewing, crafts, decorating, recipes, and tutorials with a little bit of honesty and encouragement.


.jpg)