Merida Doll Dress Pattern and Tutorial
/At our recent trip to the thrift store to get bunny ears, we also picked up a few other things. One of them was a Merida doll. My 3yo LOVES that movie! (Honestly, I have never even seen the whole thing. If the kids are glued to the TV, I am busy getting something done. Like sewing.) Normally, I would not buy a doll with curly hair, but it was only $1.50 and in great shape. It took me about a half hour to tame those curls to perfection, which, ironically, was more time than I had spent on my own hair the entire week. The only problem was that she was wearing Elsa's dress and it didn't fit her. My daughter whined incessantly for new clothes (and boots) for Merida and I regretted our bargain purchase within a few hours. I had to create a pattern that would fit Merida and I was pretty happy to have nailed it on the first try using some cheap scrap fabric. (I was pretty excited to post about it on Instagram, too! You can follow me HERE!)
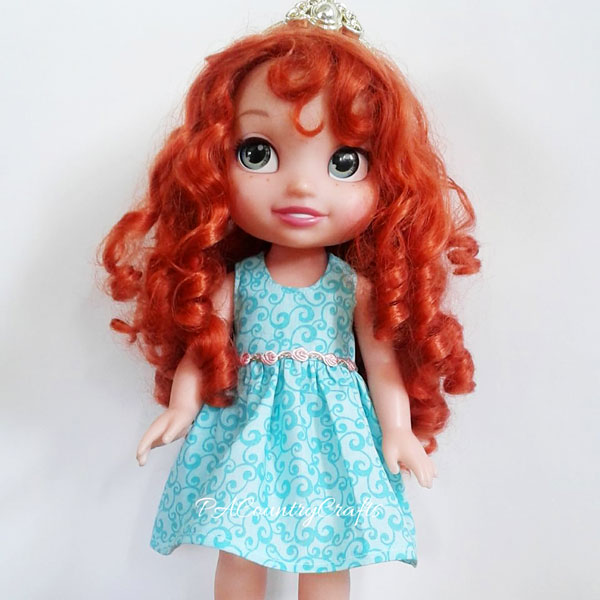
I knew I would be nagged into making more dresses for her and since that one got dirty and needed to be washed the same day that I made it, I went ahead and made another one. This time, however, I took some pictures to share a tutorial. I also constructed it so that it does not require a serger, because I know not everyone is fortunate enough to have one of those glorious machines. All of the seams are enclosed so that it will hold up to washing when it gets dirty the first day it is made. The dresses that come with these dolls are always so poorly made that they fall apart. It makes me sad.

Also, this dress is very basic, so it can be easily embellished. I thought this fabric was perfect- my daughter requested greenish blue and it has arrows on it, which I do remember seeing in the movie. I added a little gold ric-rac trim along the bottom to match her crown.

I took pictures of the process and made a pdf pattern available for free download, too!

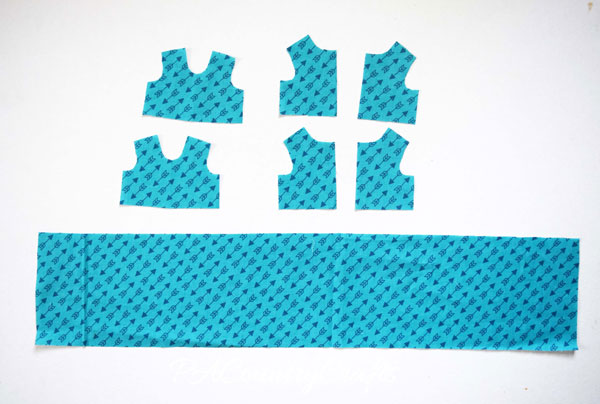
This dress requires very little fabric! I started with a strip of fabric off the bolt (44") measuring 5" wide.

From one end of the strip I cut all of my bodice and lining pieces, leaving a little over half of the strip for the skirt portion of the dress. If you would like a fuller skirt, you can use a longer piece of fabric for the skirt.
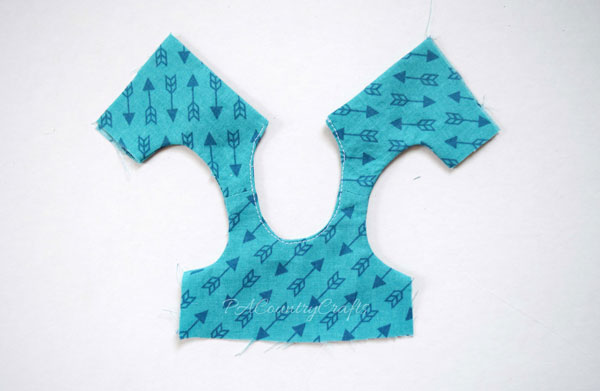
Start by sewing the shoulders together for the front and back pieces. You could use a contrasting fabric for the lining if you prefer. I was keeping it simple. (Use a 1/4" seam allowance throughout unless otherwise noted. Since these are tiny pieces, it is a good idea to use a short stitch length, too.)

Line up the shoulder seams with the right sides together and stitch the front and back pieces around the arm holes, neckline, and back. The only thing you are not stitching together is the bottoms and the sides under the arms.

CAREFULLY trim the seam allowance to reduce bulk. Clip the corners on an angle, too, so they get sharp and crisp-looking when you flip it.

Flip right side out and press really well. I mean it! Skipping the ironing makes your project look like garbage! You can also topstitch close to the edge around the neckline. It probably isn't necessary but I did.
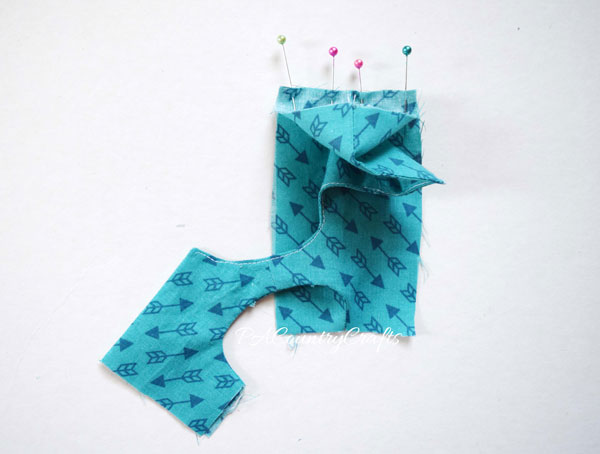
Next, open up the sides, line up the seams, and sew right sides together. I hope this isn't too hard to understand. You are sewing it so that the seams are inside the bodice.
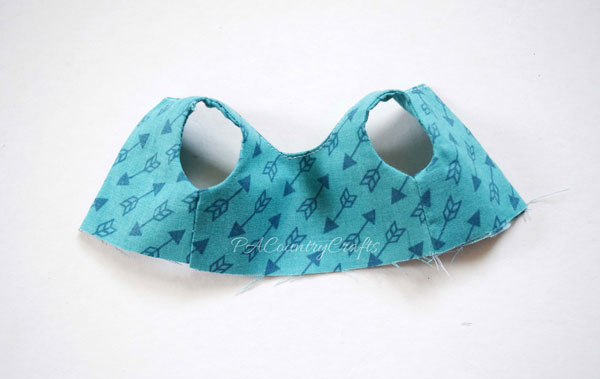
See? Everything is neat and enclosed!
Now it is time to assemble the skirt! Hem the short ends by turning in by 1/4" twice and stitching down.
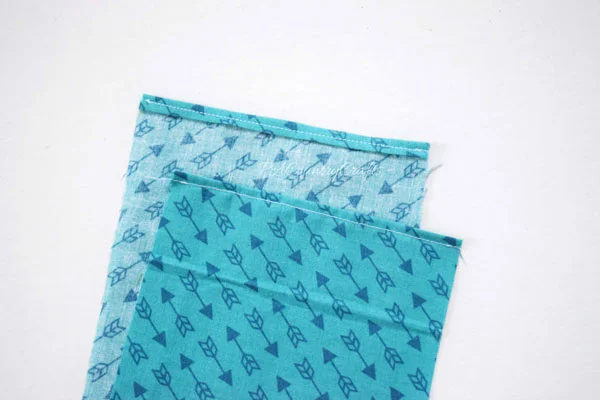
Hem the bottom edge of the skirt, too. The only thing left raw now is the top.
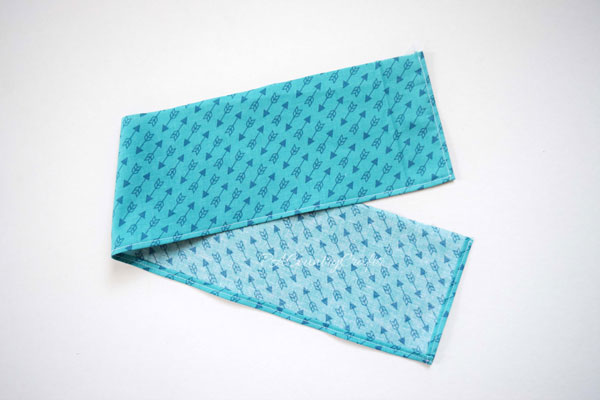
Sew two parallel lines close to the top edge with the longest stitch length on your machine. Start and end just before the hem. Knot one end together and leave long threads loose on the other end.

At the hem, mark the middle of the skirt with pins, then put pins in halfway between the middle and ends.

Line the pins up with the side seams and center of the front bodice. Pin the skirt to the outside only of the bodice!

Sew the skirt to the outside of the bodice. Then, fold the lining under on the inside so that it covers the seam and raw edges. Take your time. If you fold it under too much it won't work.
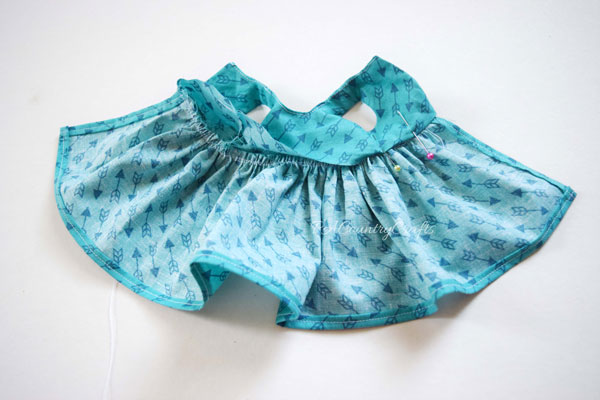
Topstitch on the right side just above the waistline- about 1/8" or less.

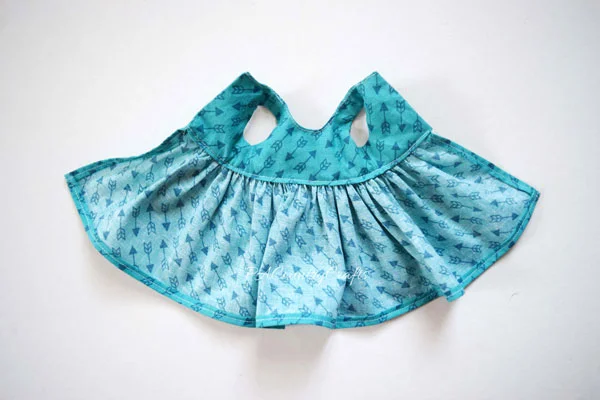
If you did it right, it should hold everything in place on the inside, too. No raw edges anywhere!
Now, if you have an overlock machine, you can just pin the gathered skirt to both the outside and the lining, then overlock over the waistline to finish it. It is much easier!
Cut two small, 1/4" wide pieces of velcro and stitch them to the top of the bodice- one on the outside and one on the inside. Matching thread would be nice here.

Then, line everything up, overlap, and stitch the edges of the skirt together. Leave the top inch or so open so that it goes onto the doll easily. You could use velcro the whole way if you want, but I was dealing with those curls, so I wanted to minimize the velcro as much as possible. I also continued the stitching line on the top of the skirt so that there wouldn't be a gap in my stitches (since my thread didn't match).

This is a very basic dress so you can embellish it if you wish. Trims, buttons, etc. can really make it fancy! I plan on making the next dress out of satin scraps.
Here is the link to the free downloadable pattern:

Obviously this dress fits Merida well, but the Elsa dress that she was wearing when we got her was too small. I would be interested to see if this dress fits other 14 inch dolls. There is a little extra ease in the chest for this dress so I think it would fit a Wellie Wisher doll. If anyone tries it, let me know! As always, if you make a dress using this pattern, I would love to see pictures! You can e-mail me or post them on my facebook page!
If you want to pin this for later...

You may also like...