Easy Doll Maxi Skirt Tutorial
/
Make a doll maxi skirt with these simple tutorial. You can make a whole bunch of these from old t-shirts or knit scraps. It has a foldover yoga waistband.
Read MoreMake a doll maxi skirt with these simple tutorial. You can make a whole bunch of these from old t-shirts or knit scraps. It has a foldover yoga waistband.
Read MoreSewing tutorial for a self-drafted baby halter top. This can easily be made in any size and it is great because there are no buttons or zippers to sew. There is a cute fabric flower embellishment and hair clip, too!
Read More
 |
| Please excuse the photographer's finger in the top corner there. :) |


 |
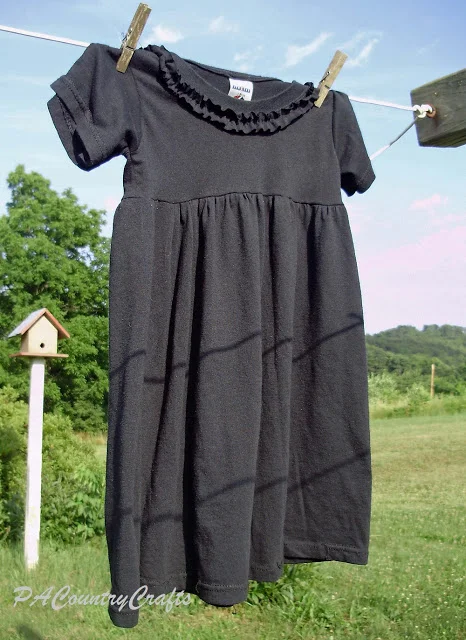
| You can't tell by the super sunny pic my 5yo took for me, but this shirt is an awesome minty aqua color. Oh, and in case you are wondering, I am 29 weeks here. Yeah. 2 1/2 months to go. Yes, there is just one baby in there. Feel free to laugh. I am used to it. |
So, there you go! If you could snag some great thrift or clearance deals, this would be a great money-saver! It was easy and if I don't stain them up this summer (forget putting your napkin on your lap- my belly catches everything!) I will probably cut the sides open to take them in again post-baby. It would only take, like, 10 minutes. Maybe 15 if I hem the bottom to make it shorter. Yes, I am still justifying my splurging impulse buy here. :)
Linking up to:
Craftastic Monday, Motivate Me Monday, Made By You Monday, Take a Look Tuesday, Tasteful Tuesdays, Carolyn's Homework, The Winthrop Chronicles, Handmade Tuesdays, Inspiration Exchange, Sugar and Spice, Whatever Goes Wednesday, Make Bake Create Party, We Did It Wednesday, What I Wore, Read, And Made, Show Me What Ya Got, Lil' Luna, Adorned From Above, Off the Hook, Your Whims Wednesday, Show Off Your Stuff Party, You Inspired, The 36th Party, Hookin Up with HoH, Link Love Thursday, Blog Stalking Thursday, The Homemaking Party, Creative Inspiration Party, Create It Thursday, Shine On Friday, Friday Favorites, Friday Favs Party, Think Pink Sundays, and ThreadingYourWay.

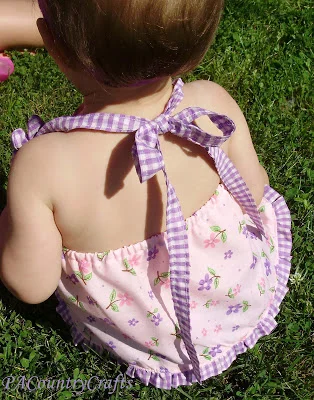
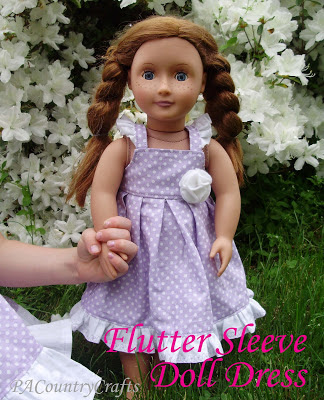
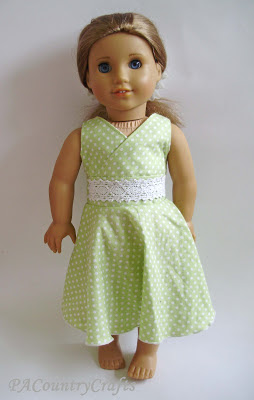
When my 5yo got her own "fake American Girl doll" for her birthday, she immediately began nagging incessantly for a doll dress to match her Flutter Sleeve Sundress. Since I made them for her sisters, it was only fair, so I whipped one up as soon as I got a chance.

She loves it! Again, I took pictures this time since I didn't have a deadline and could sew in the daylight hours, so you are getting a tutorial! YAY!
I made a pattern for you (again, this is for personal, non-commercial use only and don't sell this pattern, please and thank you). You can download the pdf pattern HERE.
For the bottom ruffle and side ties, cut two strips 2" by the width of the fabric (about 44"). Cut one of those strips in half. The bottom ruffle will take 1 1/2 strips. Take the remaining half strip and cut that in half. Those are your side ties.
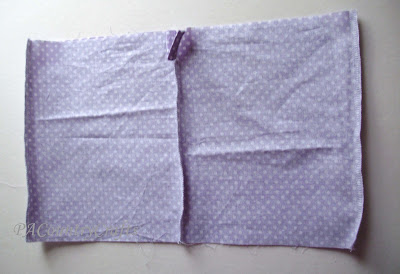
This is all of the pieces:

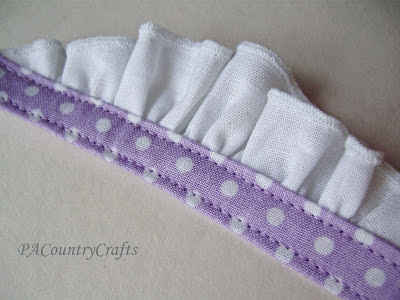
Let's start out with the straps. I used a rolled hem edge on the ruffles, so if you don't have a serger, you can cut them a bit wider and do a small folded hem instead. I sewed a long, gathering stitch along the bottom edge.
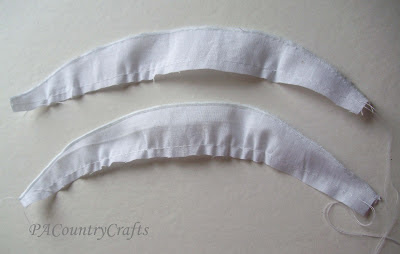
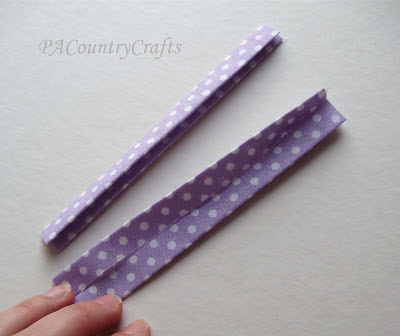
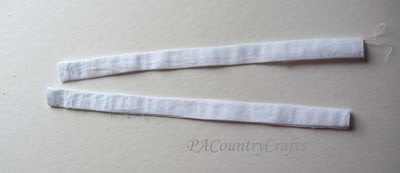
To make the straps, press the fabric like you are making double-fold bias tape. Press the long edges to the center, then press again to fold it in half.
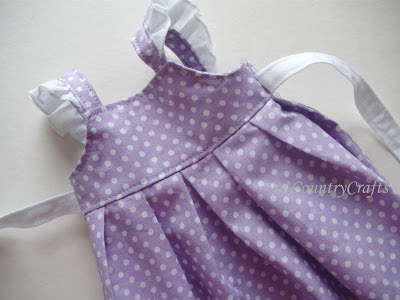
Gather the ruffles and sandwich them into the straps with pins. I left a little extra room on the ends in this pic, but the ends of the ruffles should be about 3/8" from the edge of the strap.
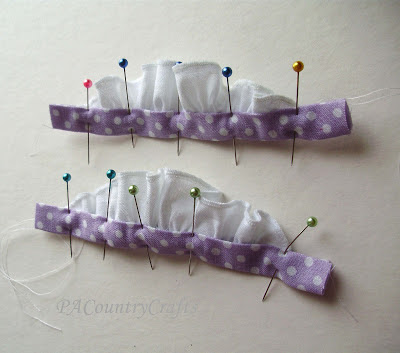
Sew about 1/8" or less from each side to attach the ruffle and topstitch. It looks so professional this way!
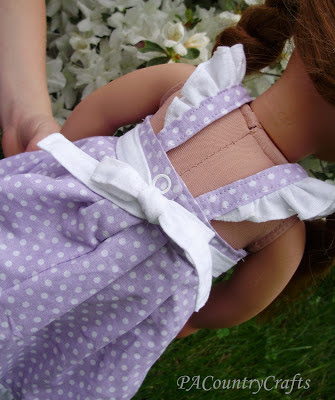
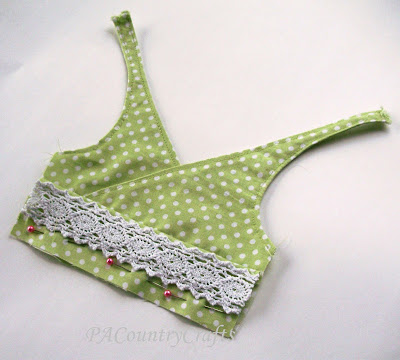
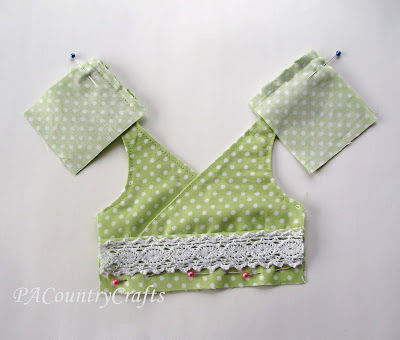
Pin the straps to the bodice, sandwiching them between the front and back pieces and leaving 1/4" seam allowance to the corners.
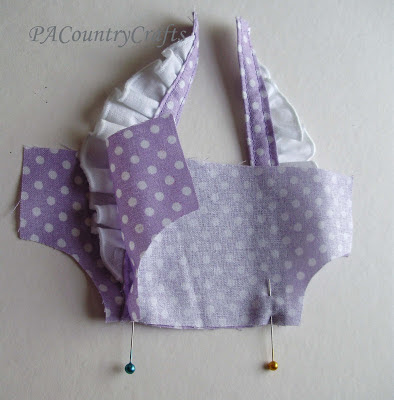
Clip the curves, flip, and press.
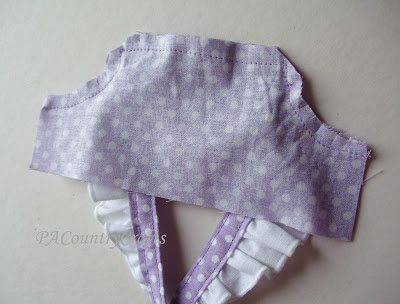
Attach the straps to the back pieces the same way. The strap should be about 1" from the inside edge of the back and angled slightly as shown. (I left one of the back pieces off for the picture so that you can see the angle- they should be sandwiched when you sew it.)
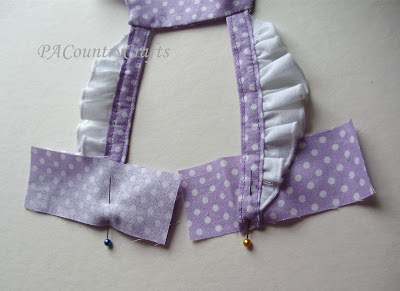
Make the side ties by sewing right sides together, flipping, and pressing neatly.
I topstitched all the way around and hemmed the ends, too. I just didn't take a picture of that. Now, I skipped some pictures here, but all you have to do is pin the straps into the sides 1/2" above the bottom edge and then sew the sides together. I serged them for more stability, too. Then, I totstitched all the way around the edge of the bodice. Sorry, I know that is a lot at once.

OK, for the skirt portion of the dress... sew the sides together and sew up the back center seam, leaving the top 2" open. Overlock or zig-zag over the raw edges.
Make a button placket to cover the opening. I am not going into detail on that part because I already did that HERE if you need help.

Then, just make your pleats using good ol' trial and error and pin the skirt to the top, right sides together.

Sew and overlock or zig-zag the raw edge and topstitch in place on the bodice about 1/8" above the skirt.
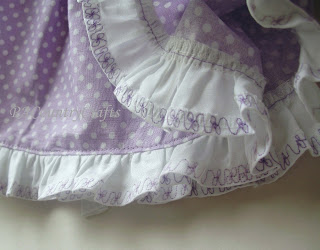
Almost done! Make the bottom ruffle by sewing the two pieces together and hemming the bottom edge. I was playing with my new machine and made a fancy stitch here.
Gather and sew it to the bottom edge of the skirt. Overlock or zig-zag stitch over the edge and then topstitch it in place.
Insert a snap in the back...
...and make a little felt flower for the front.

TADA!

It made her so happy!

It makes me very happy that Grace isn't old enough to ask for a doll and matching dress for her Little Diva Dress though. I loved all those ruffles, but a doll is not worth that much effort to me. I want to make her a matching purse instead, since she loves purses right now.
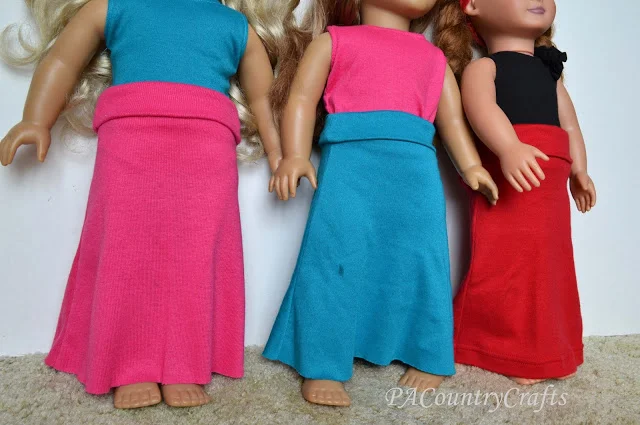
So, my 5yo wanted to take a picture of all of the dolls together...

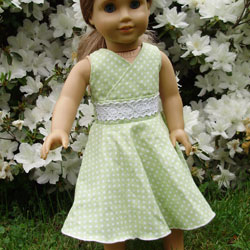
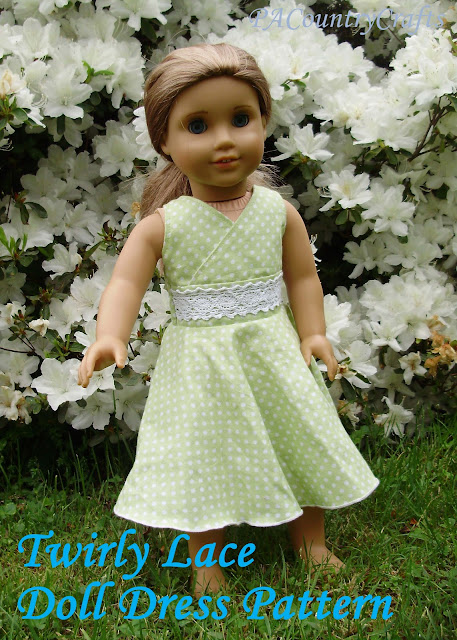
From left to right... Twirly Lace Doll Dress, Flutter Sleeve Doll Sundress, and Boutique Peasant Doll Dress.
If you make a dress using one of these patterns, I would love to see it! If you have any questions, just send me an e-mail. :)
Here are some more doll dress patterns you might like:

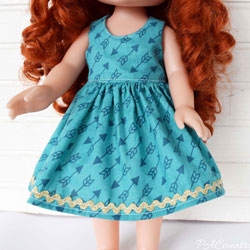
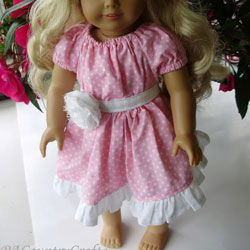
Free pattern and tutorial for this extra fancy doll peasant dress. It features a full, gathered skirt with a sash to tie around the waist and a ruffle on the bottom.
Read More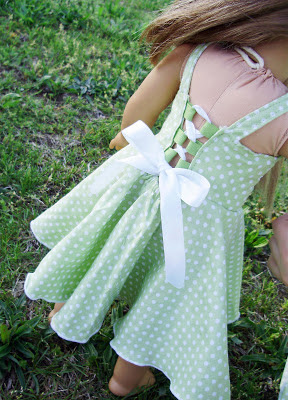
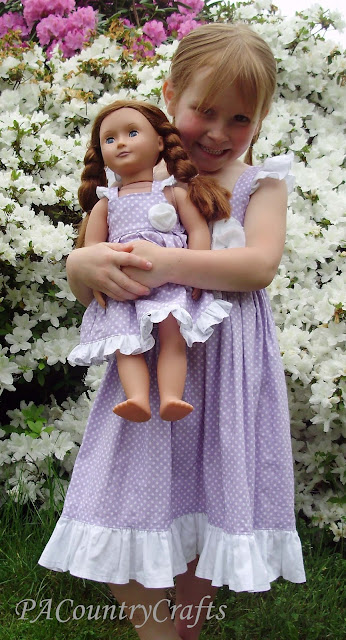
I had some fabric left over from the girls' Easter dresses, so I decided to make matching dresses for their new American Girl dolls. They loved this!
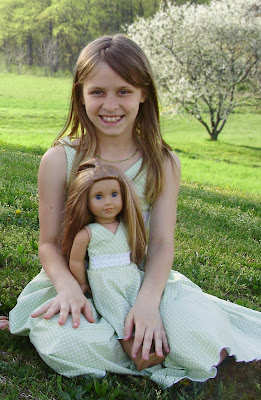
For this dress I actually made two because I am a perfectionist like that. It really took hardly any fabric, though, and I came up with some things to make it better.
First of all, the bodice and straps are all one piece:
For the back, first I basted the ribbon loops into the back pieces...
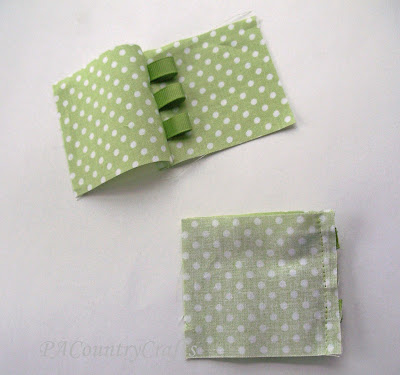
...then sewed the straps in along the tops like so...
This was much more efficient. I whipped the second dress up in less than an hour.

Everything else in the dress construction follows the Twirly Lace Dress Tutorial found HERE. Use a 1/4" seam allowance for the doll dress. If you would like, for your own personal, home use only, here are the patterns that I used:
Here are some more patterns and tutorials you might want to check out...


Make a girls’ nightgown from an adult t-shirt with this simple tutorial!
Read MoreSewing, crafts, tutorials, recipes, and a little look at our life in the country - raising half a dozen children.

Hi! Thanks so much for stopping by! My name is Lindsay and on this blog you will find sewing, crafts, decorating, recipes, and tutorials with a little bit of honesty and encouragement.