Drop Cloth Farmhouse Pillows Tutorial
/
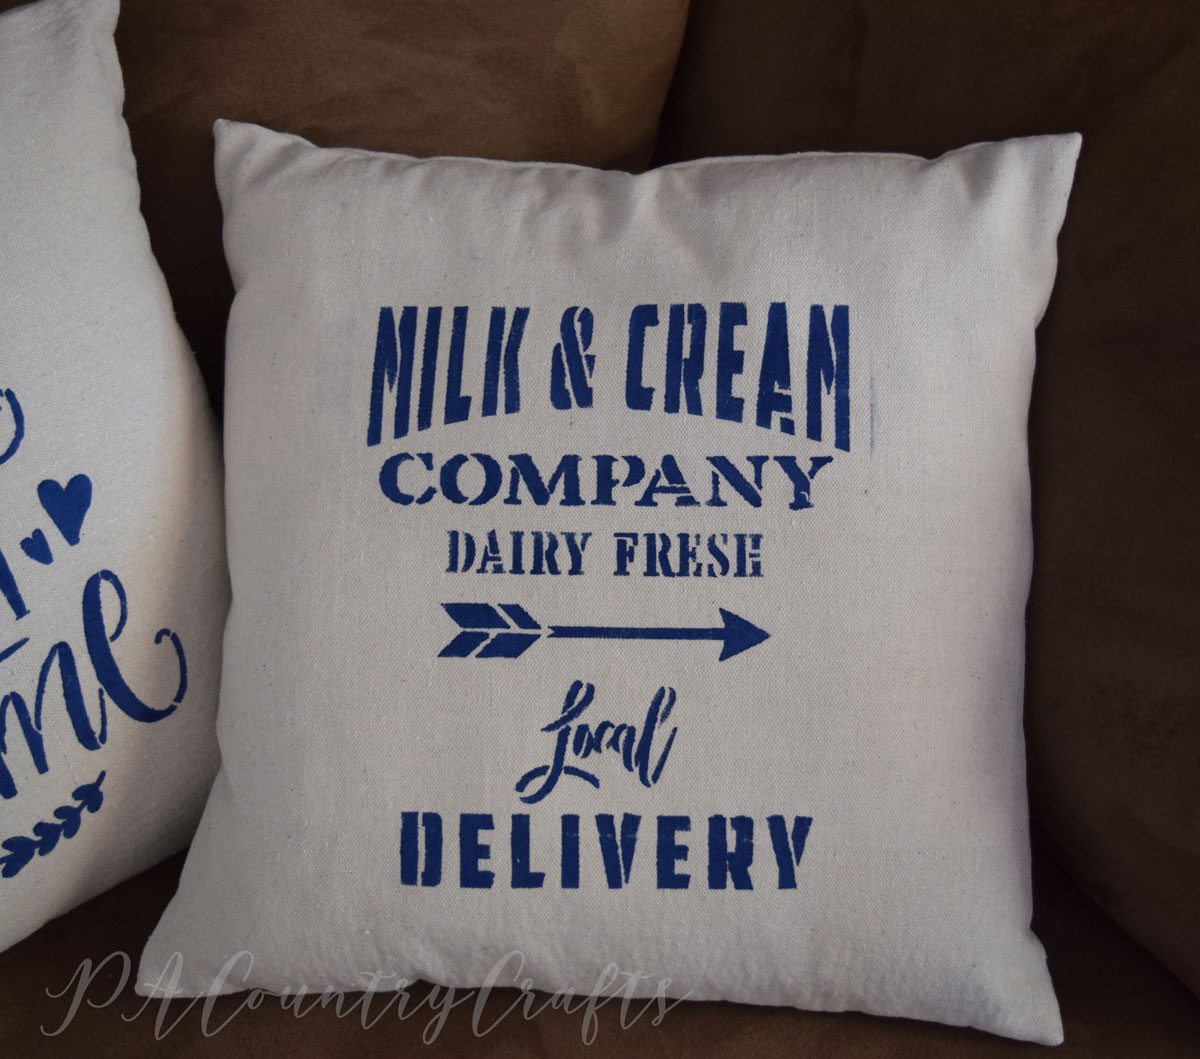
Follow this simple tutorial for making farmhouse style pillows from drop cloth, paint, and stencils from Stencil Revolution!
Read MoreFollow this simple tutorial for making farmhouse style pillows from drop cloth, paint, and stencils from Stencil Revolution!
Read MoreEasy DIY hair clips made from puffy hearts from the Target Dollar Spot valentine section. They have glitter and flip sequin hearts!
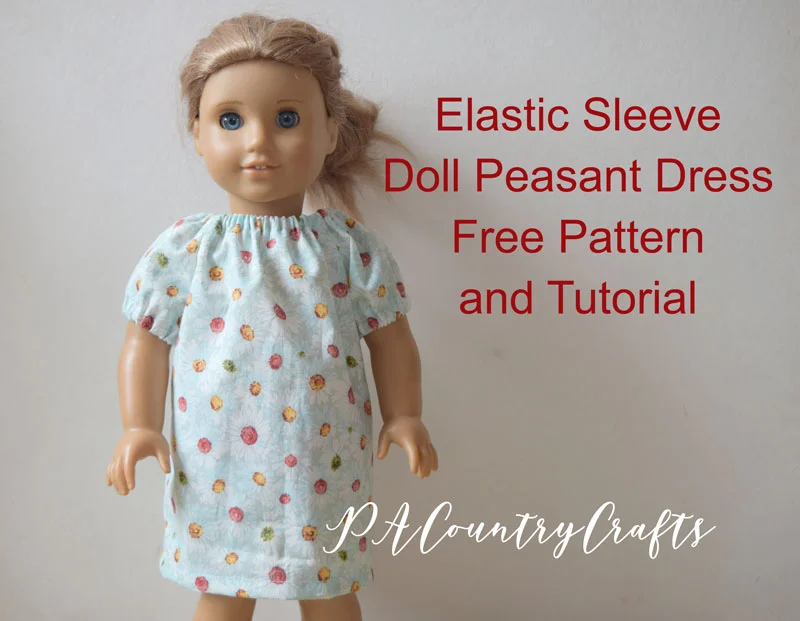
Read MoreGet this free basic doll dress pattern for 18” (American Girl) dolls. It is a classic, sleeveless dress with a gathered skirt and can be made from 1/4” yard of fabric.
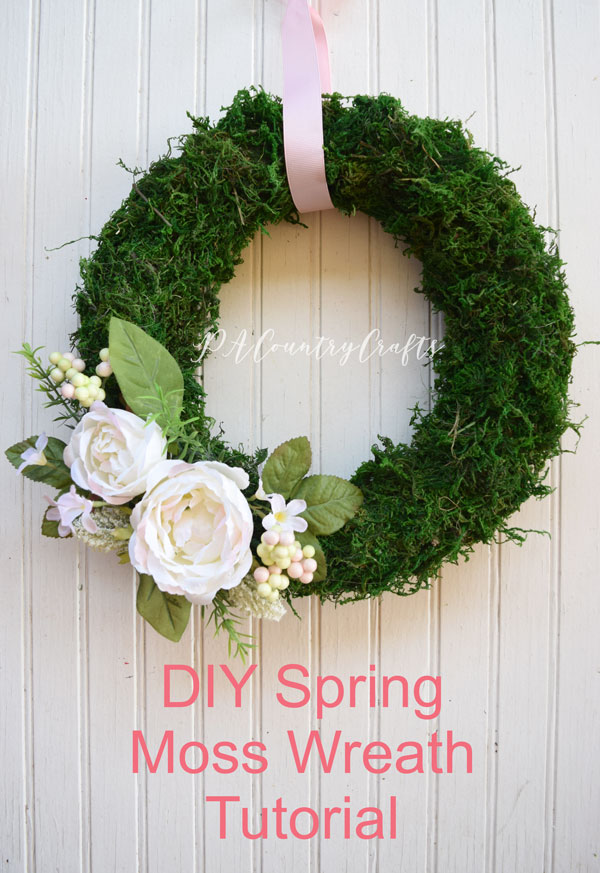
Read MoreIt is not too often that I actually make something for myself. I actually do not have a great place to display this wreath, but I made it anyway and I really love it!
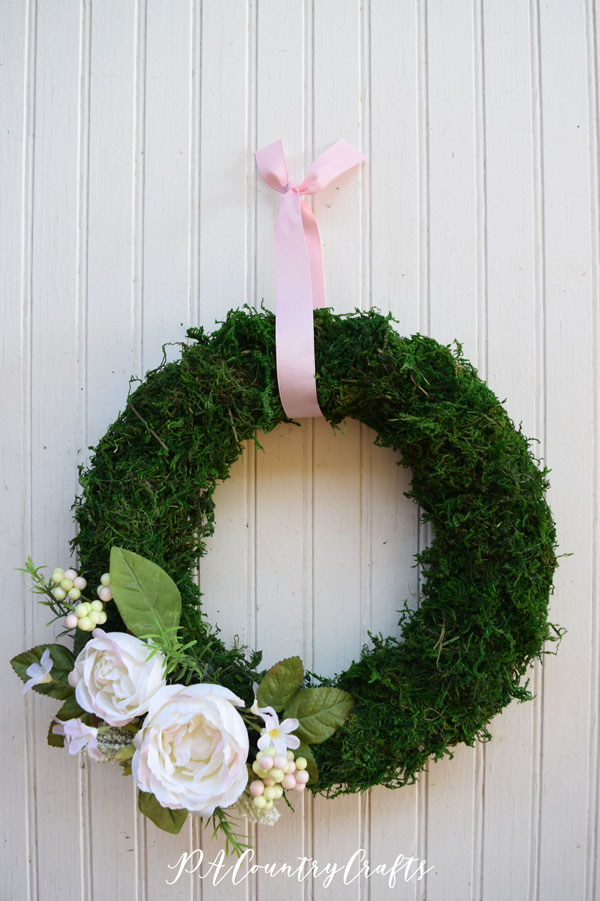
I had some foam wreath forms a friend had given to me a long time ago and I just hadn't found a use for them. Recently, I was browsing Pinterest and saw some cute moss wreaths I thought I could make. For myself!
The wreath form was free, but they do carry slightly smaller ones at the Dollar Tree. I also got a bag of moss at the Dollar Tree. The flowers came from Michaels. I actually wanted coral ones, but there was a sweet older lady who asked my 12yo which flowers she recommended (I guess we have similar taste, my daughter and I) so I found something else. Anyway, this was a really cheap project!
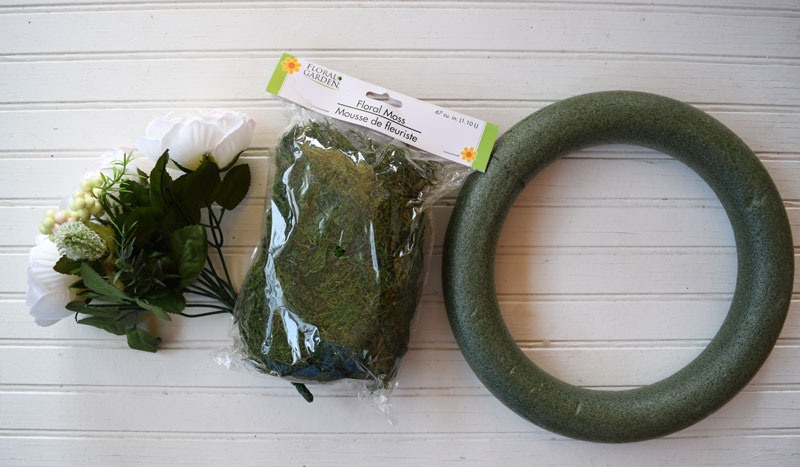
So, gather all of your supplies...
A ribbon to hang would be helpful and is not shown. You also need hot glue sticks, a glue gun, toothpicks, and green floral tape.
Now, the moss part was a mess. I made this on my kitchen counter, but anticipate snibbles of moss everywhere!
Just take small bunches of moss and hot glue them onto the wreath form. It takes quite a few sticks of hot glue. Check for any thin spots and add more as needed.
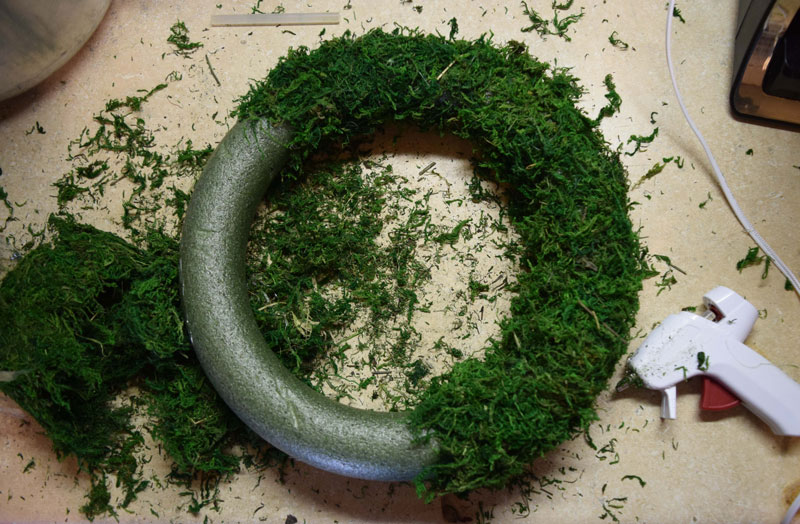
It is actually still pretty cute plain!

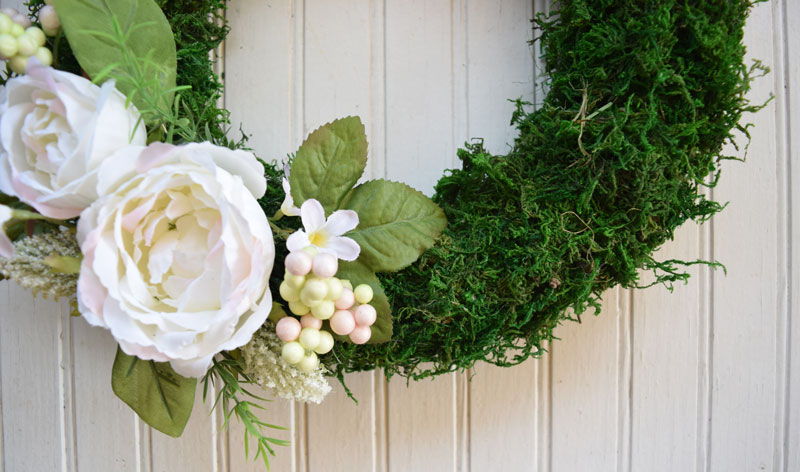
Next, add the flowers. Cut them apart and lay them on the wreath until you get an arrangement you are happy with. My flowers had enough stem to poke into the wreath but I added some hot glue around the bottom of the flower just in case. Attach the leaves to toothpicks using hot glue and green floral tape. Stick them into the wreath as well.


Pretty easy, right? Hot gluing the moss is a little messy and tedious, but I priced similar wreaths at $30. The moss sheds a little, so I don't want to hang it on a door that is opened and closed a lot, but on a wall it is pretty!
If you want to pin it for later...
You may also like these posts...
Create a simple doll dress with gathered elastic sleeves. Free pattern and tutorial for a beginner sewing project. There is also a free pattern available on the website for a matching girls’ dress.
Read MoreSeveral years ago I was very ambitious and made hair clips for my girls. I got a bunch of supplies to get started. Then, over the years, I collected more. And more. And more. And made less. And less. And less.
They are so cute! You can make them for holidays, stocking stuffers, and Easter egg fillers. At one point I wanted to have headbands or hair clips to match all of my girls' outfits!
Ha! I am happy if I can find a plain, black hair elastic most days. (Seriously! Where do they all go?!?)
But in my #springdeclutteringchallenge I purged a lot of my ribbon and trims. It needed to be done because I had way too much stuff. I also used up a lot of what I had, even inviting a friend over to make hair stuff with me. (There were unfinished felt flowers in my box that we made last time- just before her 5yo was born!)
Since I was mass producing these adorable (and EASY!) little bow clips I decided to put together a tutorial. We had a Nor'Easter here at the time, so the pics are kinda dark. That is PA spring weather for you, though. Anyway, here it goes...

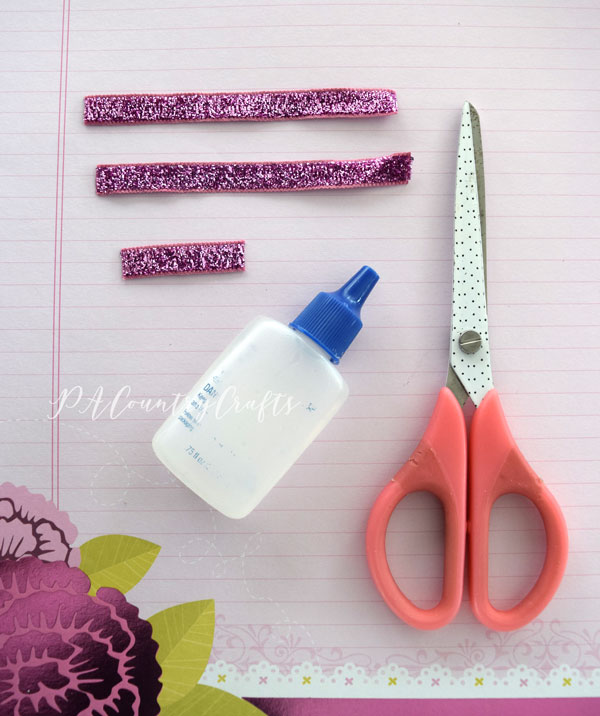
Here are the supplies you will need:

I used 3/8" glitter ribbon from the Target Dollar Spot that I got around Valentine's Day. Grosgrain ribbon also works. I got my 1 3/4" double prong alligator clips from etsy (in bulk) but if you just want to make a few of these you can pick some up at craft stores. That bottle with the lettering worn off is my fray check. :)
Side note: The U.S. government has all sorts of safety rules to keep our kids safe from lead, so please be aware that there are regulations out there if you sell things like this!
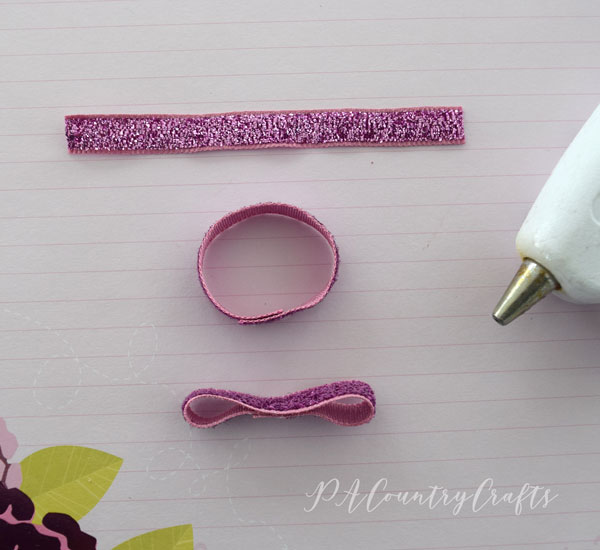
You will need to cut two pieces of ribbon 4" long and one piece 1 1/2" long. Seal the ends with fray check. If I am using grosgrain I carefully melt it with a lighter.
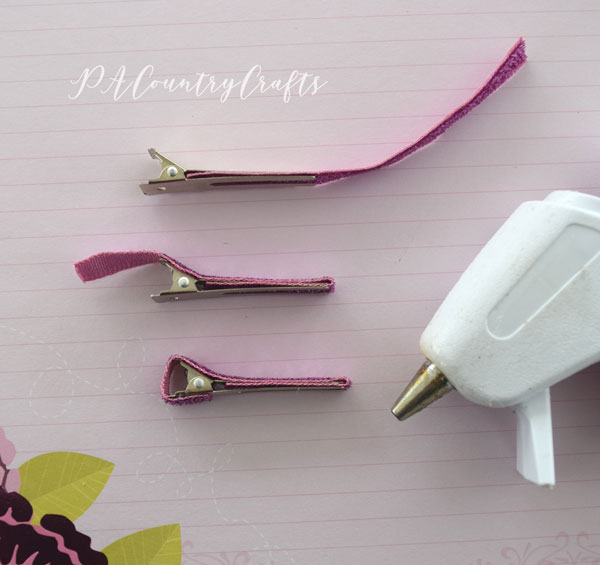
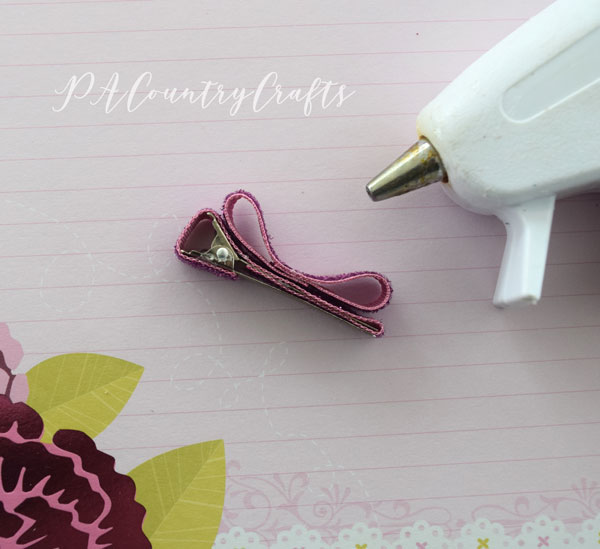
Wrap one piece of ribbon around the hair clip, using hot glue to attach it. The underside of the bent, top prong will have ribbon over them, but the bottom prongs on the flat side do not. These clips are actually really cute with only the glitter ribbon covering them so you could stop there if you would like. I usually add the little bow, though.
To make the bow, take your other 4" piece of ribbon and overlap the ends, hot gluing them together. Then, glue the top and bottom of the circle together in the middle. Be careful to make these loops the same size!
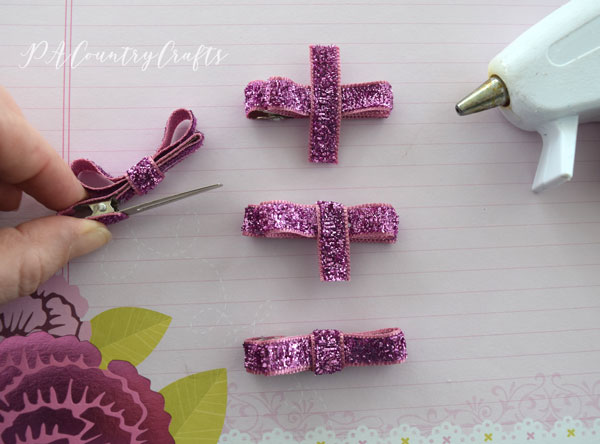
Next, glue the bow to the center of the top of the hair clip. I just glue it down in the middle. You could glue more if you would like.
Finally, use the short pieces of ribbon to wrap the center of the bow. Glue it on top and overlap both ends on the bottom of the upper prongs. You have to squeeze the clip to open it up so that you can get to the underside. If you have non-slip grips you can put them on the underside of the top prongs as well. I don't have any.
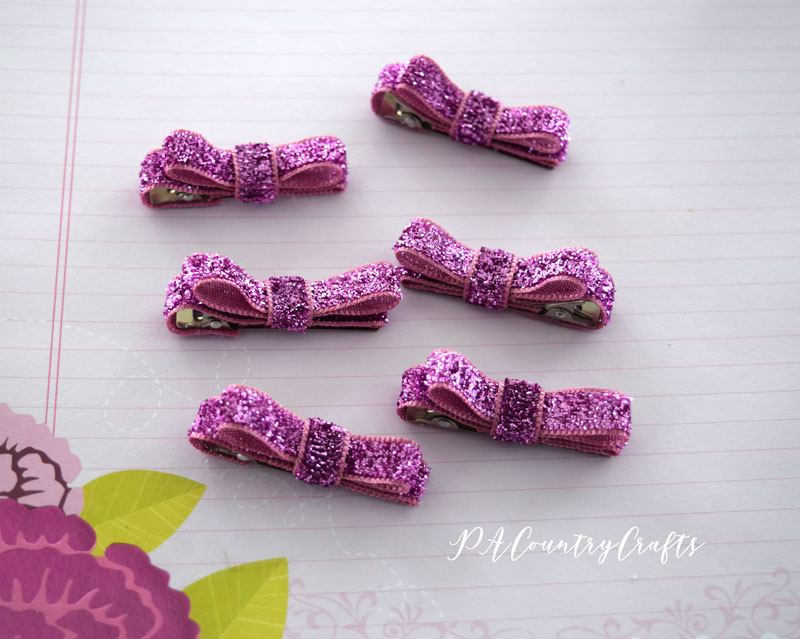
Finished! These only take a few minutes to whip up. Can you see why I overbought supplies? I am being good now, though. I promise!
If you want to pin it for later...
You may also like...

Fabric Bow Tutorial

Free sewing pattern and tutorial- works as an 18” doll top or a baby doll dress. This peasant top is so easy it makes a good beginner sewing project.
Read MoreSewing, crafts, tutorials, recipes, and a little look at our life in the country - raising half a dozen children.

Hi! Thanks so much for stopping by! My name is Lindsay and on this blog you will find sewing, crafts, decorating, recipes, and tutorials with a little bit of honesty and encouragement.