Girls Room Collage Wall ~ with Free Printables!
/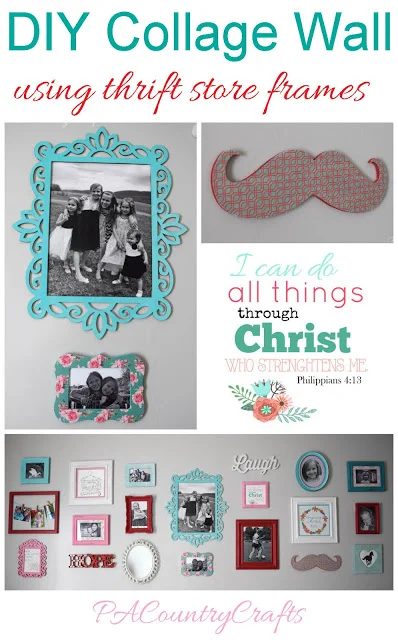
Make this DIY collage wall with thrift store frames and free printables!
Read MoreMake this DIY collage wall with thrift store frames and free printables!
Read More
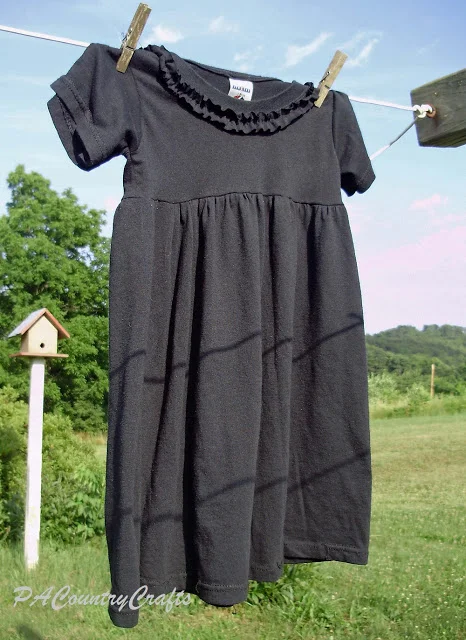
The next Easter dress I made cost me absolutely NOTHING to make! Sweet!

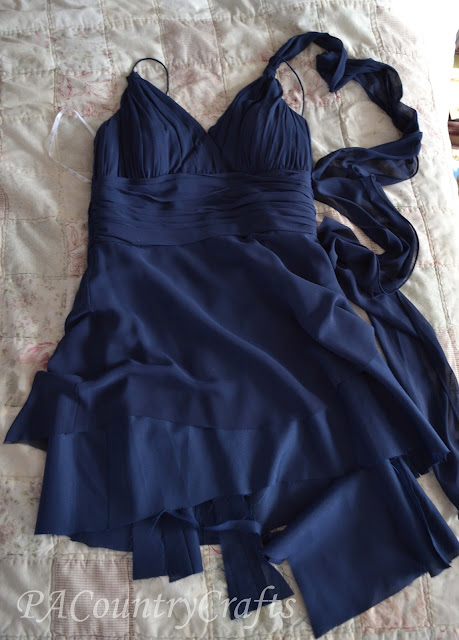
Does anyone else save old bridesmaid dresses? I am pretty sure I am not the only one. I mean, you spend a ridiculous amount of money on them so it seems a shame to throw them in the donation bin. Even if you HATED the dress! (Sorry, Sis!) It wasn't an UGLY dress. It just wasn't flattering on me. (I have wide ribs.) Then, they ordered the wrong size and my other sister and I got in a big fight when she made a joke about mine not fitting. I really just hated everything about this dress. So, naturally, I hung it in my closet for 6+ years where I could see it every day.
Well, now it is not in my closet. Now, it looks like this:
The rest of it has been transformed to create several of this years' Easter dresses including this one.
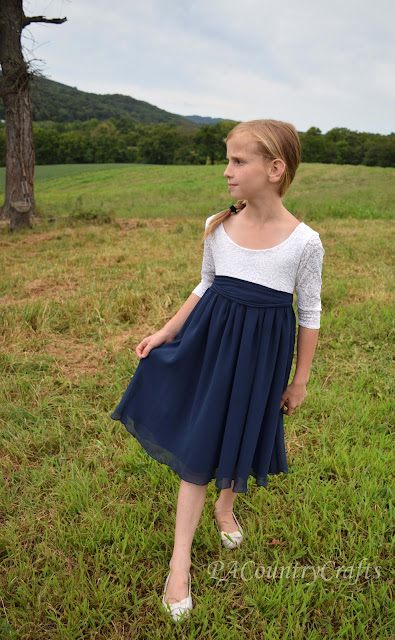
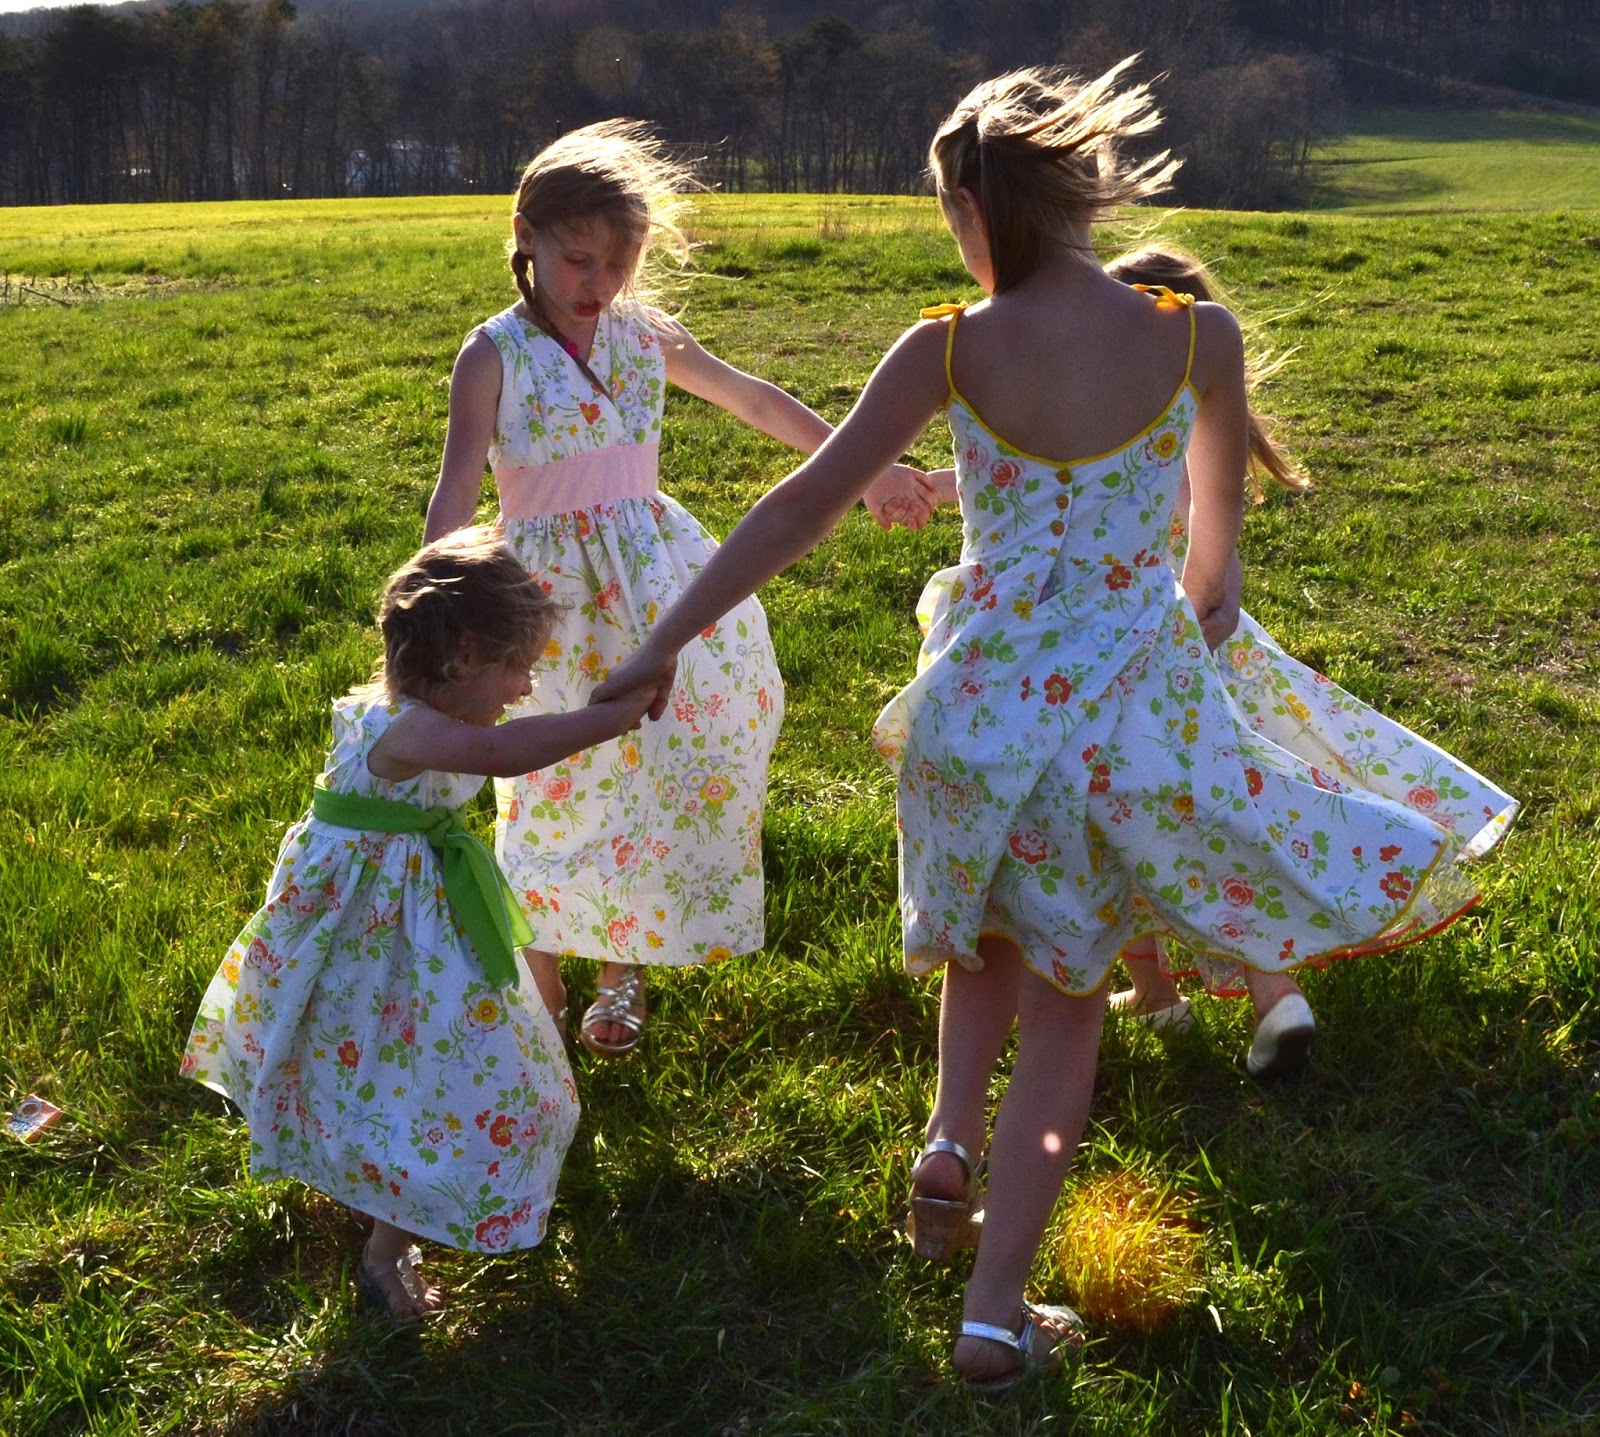
The bottom of the dress is made from the top two layers of the bottom of the bridesmaid dress. The sash is made using the strap from one side. The hardest part of making this dress was cutting the slippery, chiffon fabric to make it straight. The full skirt with lightweight fabrics makes for lovely twirling, though. The twirl factor is always appreciated by the girls.

Isabelle drew me a picture of the dress she wanted. The sleeves were such an issue of contention between us. I didn't want to make long, 3/4 length sleeves from sheer lace. I really don't like to do sleeves. I ended up making the top out of some stretch lace from a friend and an old white T shirt.
I used the
to create the bodice.
It was actually very easy!
The pattern is on sale right now. I know, I usually talk about how I hate patterns, but
has so many variations and it is so versatile that it is worth it. I am not being compensated in any way for this endorsement.
Directions were included for a lace overlay version, which is mostly what I used. I just altered it to let the sleeves unlined. I hemmed the sleeves by hand sewing them.
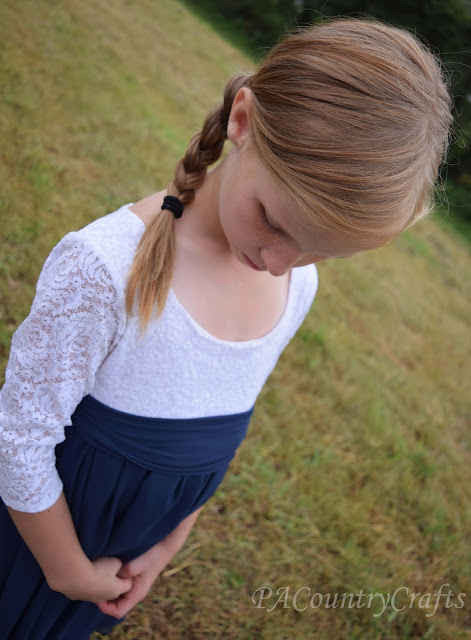
There was no hemming required around the neckline because of the lining.
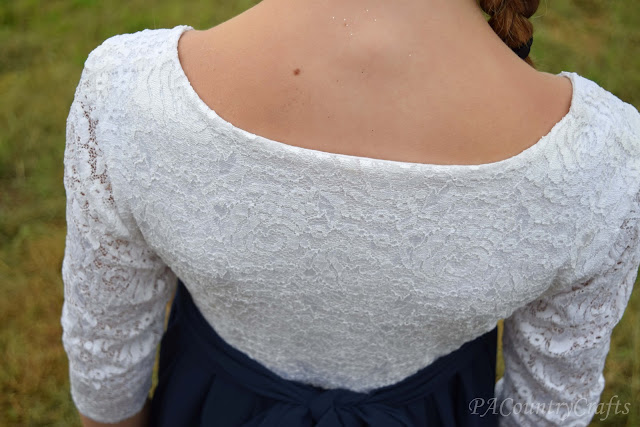
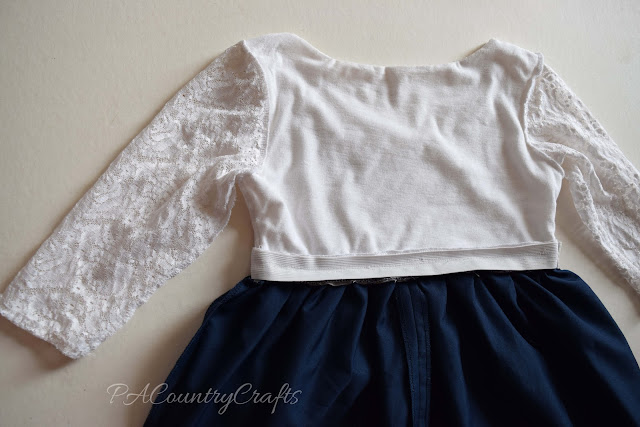
The trick to this dress was attaching the bodice to the skirt. I wanted to maintain the stretch of the fabrics so that it would easily slip over her head. So, I got some 1" elastic from my stash, sewed it in a loop and made Isabelle try the loop on to be sure the elastic would stretch enough to get the dress on. Then, I sewed each piece -top and bottom- to the elastic. Here is what the inside of the dress looks like.
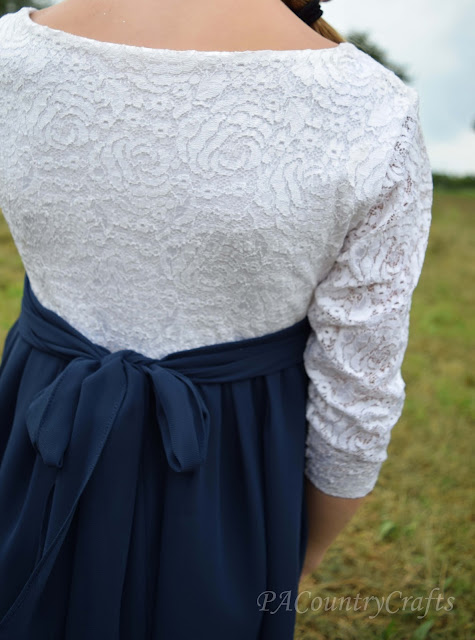
One of the shoulder straps from the bridesmaid dress was converted to a sash to tie around the waist.
Now I have one less bridesmaid dress in my closet and my daughter has a lovely dress! Win win!

I used more of the bridesmaid dress on the next Easter dress I made, but we haven't had a "real" photo shoot yet. Right now I am super busy canning tomatoes and chasing the last bit of summer. So, when I get around to it I will show you that one, too. :)

Oooh- the word "vintage" has become oh, so trendy.
Yes, I am jumping on the bandwagon.
It started out with this...
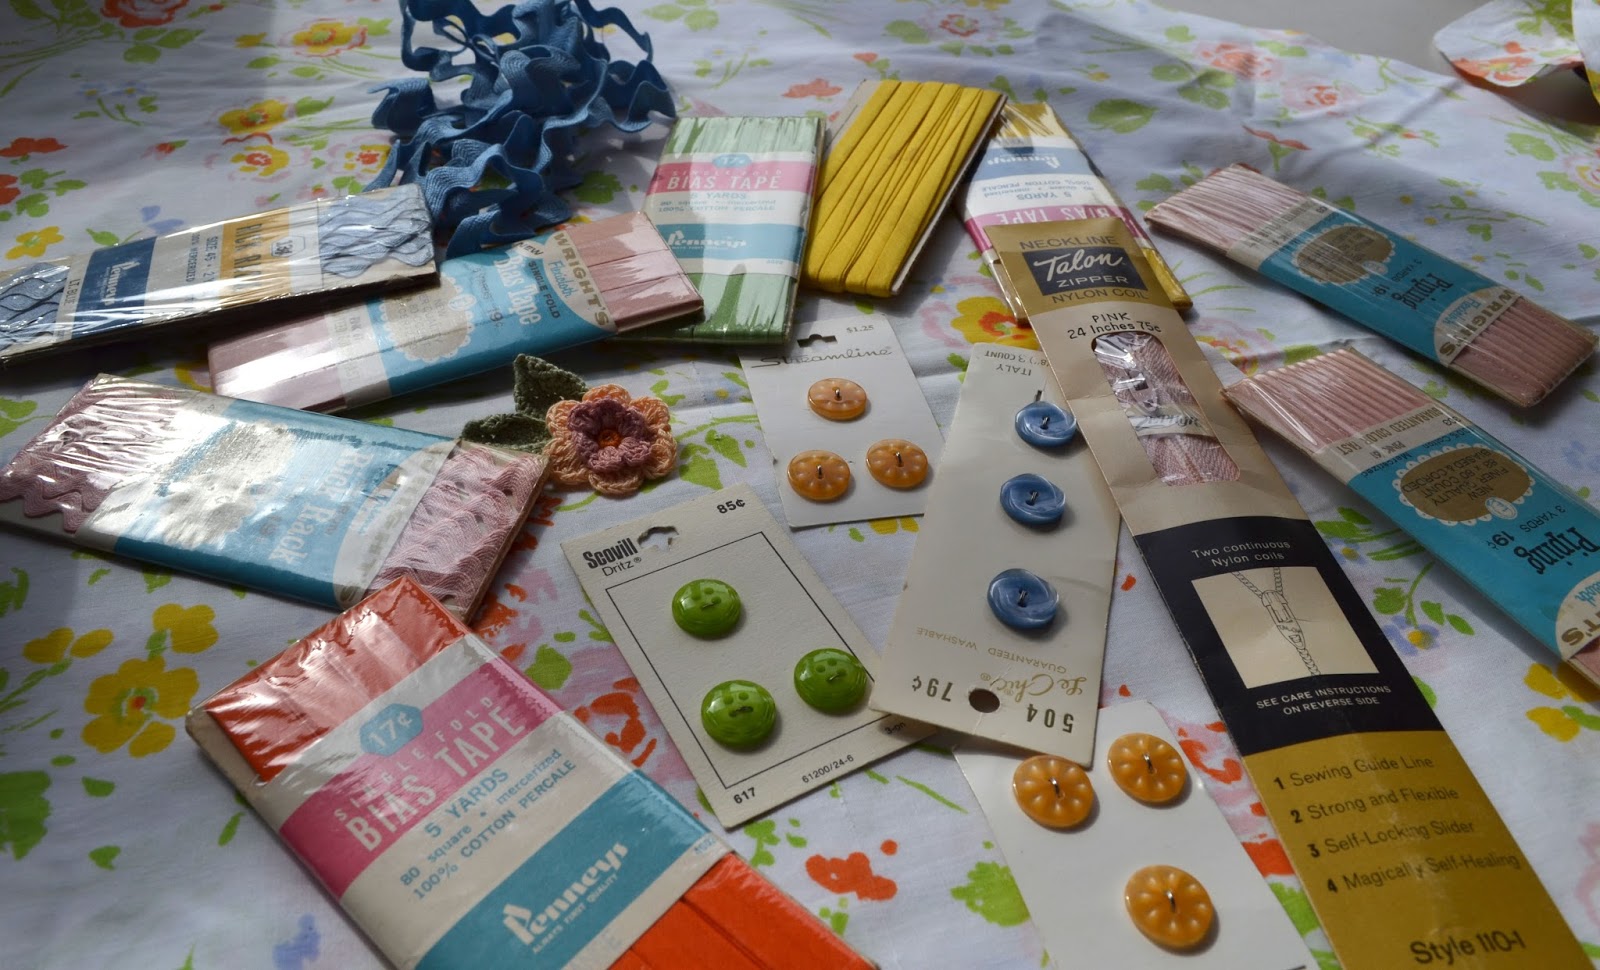
...two flat vintage sheets that my nana bought maybe in the 1970s and vintage trims, notions, and buttons given to me by some friends. The colors matched perfectly. There are 5 colors in the sheets (other than white) and I have 5 girls, so they each got their own accent color.
So, after 6 days of wild sewing, early Easter morning my girls were wearing new dresses from the vintage sheets that belonged to their great-great-grandmother.
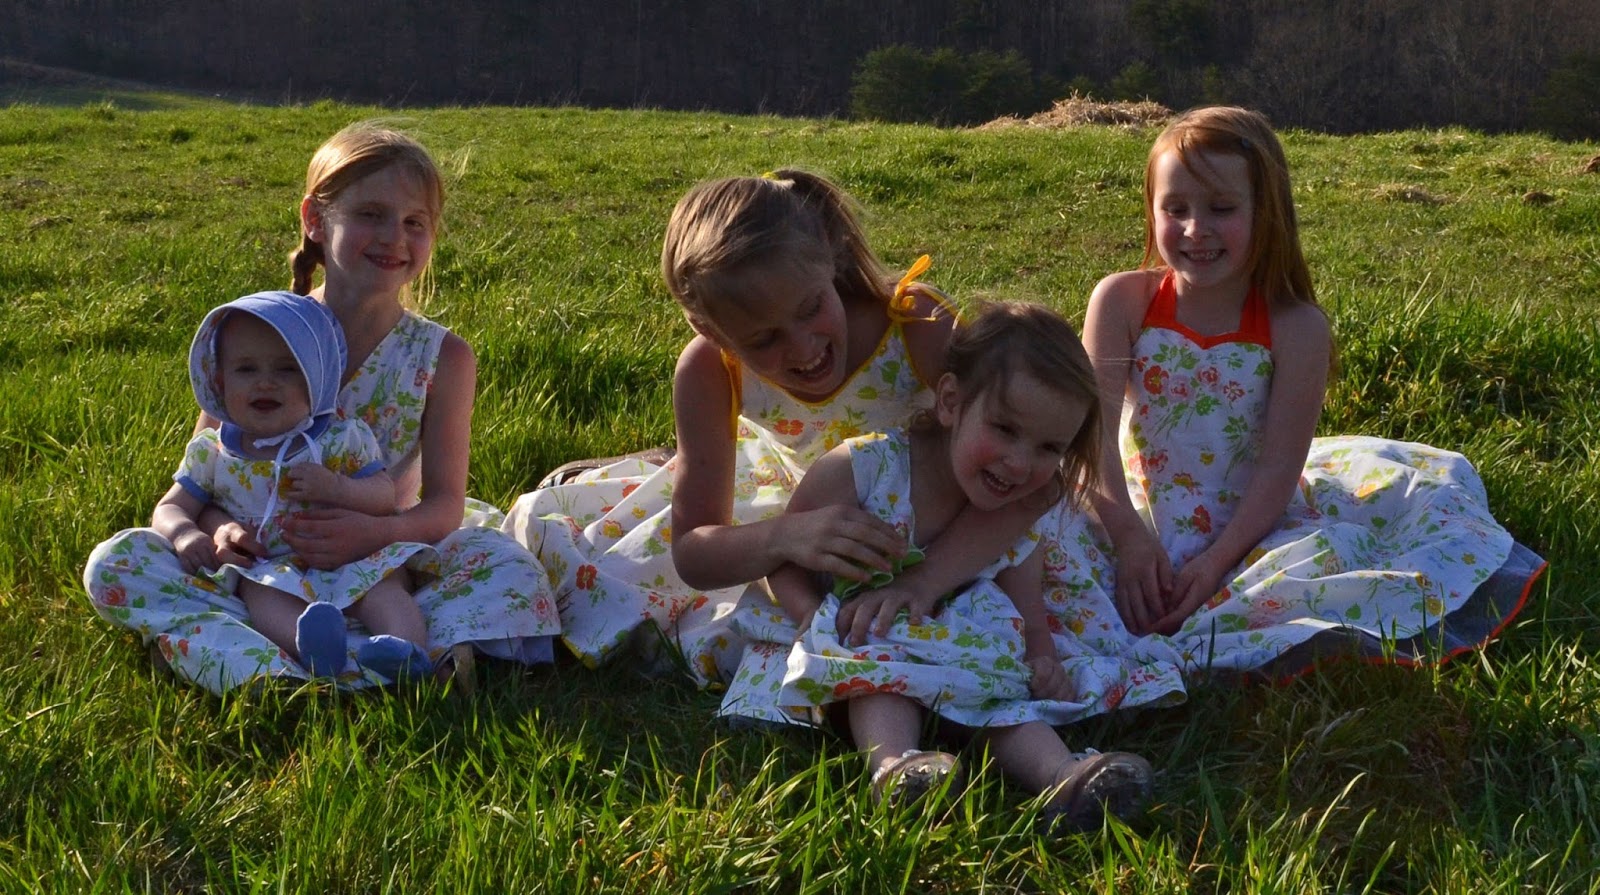

I am so blessed to be able to do something special like this for my girls.
Tutorials coming soon(ish)...
***UPDATE*** Here are the tutorials and full posts for each dress!

vintage-sheet-easter-dresses

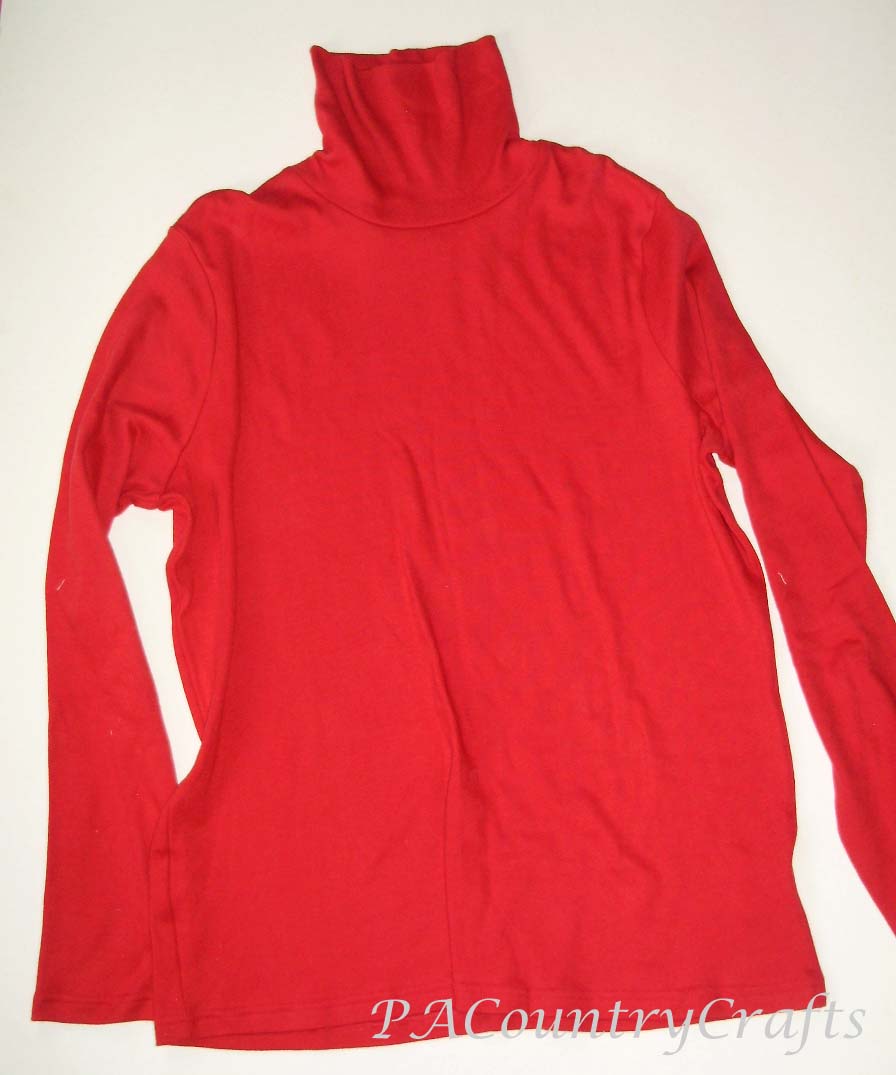
This one has been a long time coming! I finally got some cute pics of my daughter in her maxi skirt so that I could finish up this post! Last spring, when I was on my maxi skirt sewing kick, my 5yo had requested a RED one. Well, I thought I would just pick some fabric up at a nearby Walmart, but they no longer carry ANY knit at that store! :( So, I wandered over towards the clothing and found a Women's XL red turtleneck on clearance for $1!

 |
| I am not sure what she is doing with her hands here... |


Sew the side seams of the skirt, right sides together. You can use a zig-zag or stretch stitch or a serger. I used a stretch stitch and then overlocked the edges for extra durability.


 |
| Please excuse the photographer's finger in the top corner there. :) |


 |
| You can't tell by the super sunny pic my 5yo took for me, but this shirt is an awesome minty aqua color. Oh, and in case you are wondering, I am 29 weeks here. Yeah. 2 1/2 months to go. Yes, there is just one baby in there. Feel free to laugh. I am used to it. |
So, there you go! If you could snag some great thrift or clearance deals, this would be a great money-saver! It was easy and if I don't stain them up this summer (forget putting your napkin on your lap- my belly catches everything!) I will probably cut the sides open to take them in again post-baby. It would only take, like, 10 minutes. Maybe 15 if I hem the bottom to make it shorter. Yes, I am still justifying my splurging impulse buy here. :)
Linking up to:
Craftastic Monday, Motivate Me Monday, Made By You Monday, Take a Look Tuesday, Tasteful Tuesdays, Carolyn's Homework, The Winthrop Chronicles, Handmade Tuesdays, Inspiration Exchange, Sugar and Spice, Whatever Goes Wednesday, Make Bake Create Party, We Did It Wednesday, What I Wore, Read, And Made, Show Me What Ya Got, Lil' Luna, Adorned From Above, Off the Hook, Your Whims Wednesday, Show Off Your Stuff Party, You Inspired, The 36th Party, Hookin Up with HoH, Link Love Thursday, Blog Stalking Thursday, The Homemaking Party, Creative Inspiration Party, Create It Thursday, Shine On Friday, Friday Favorites, Friday Favs Party, Think Pink Sundays, and ThreadingYourWay.
Make a girls’ nightgown from an adult t-shirt with this simple tutorial!
Read More
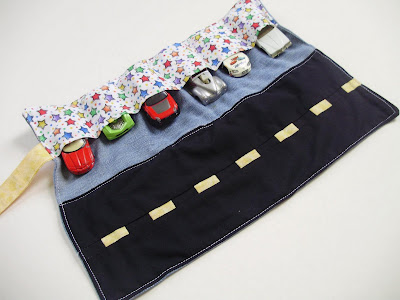
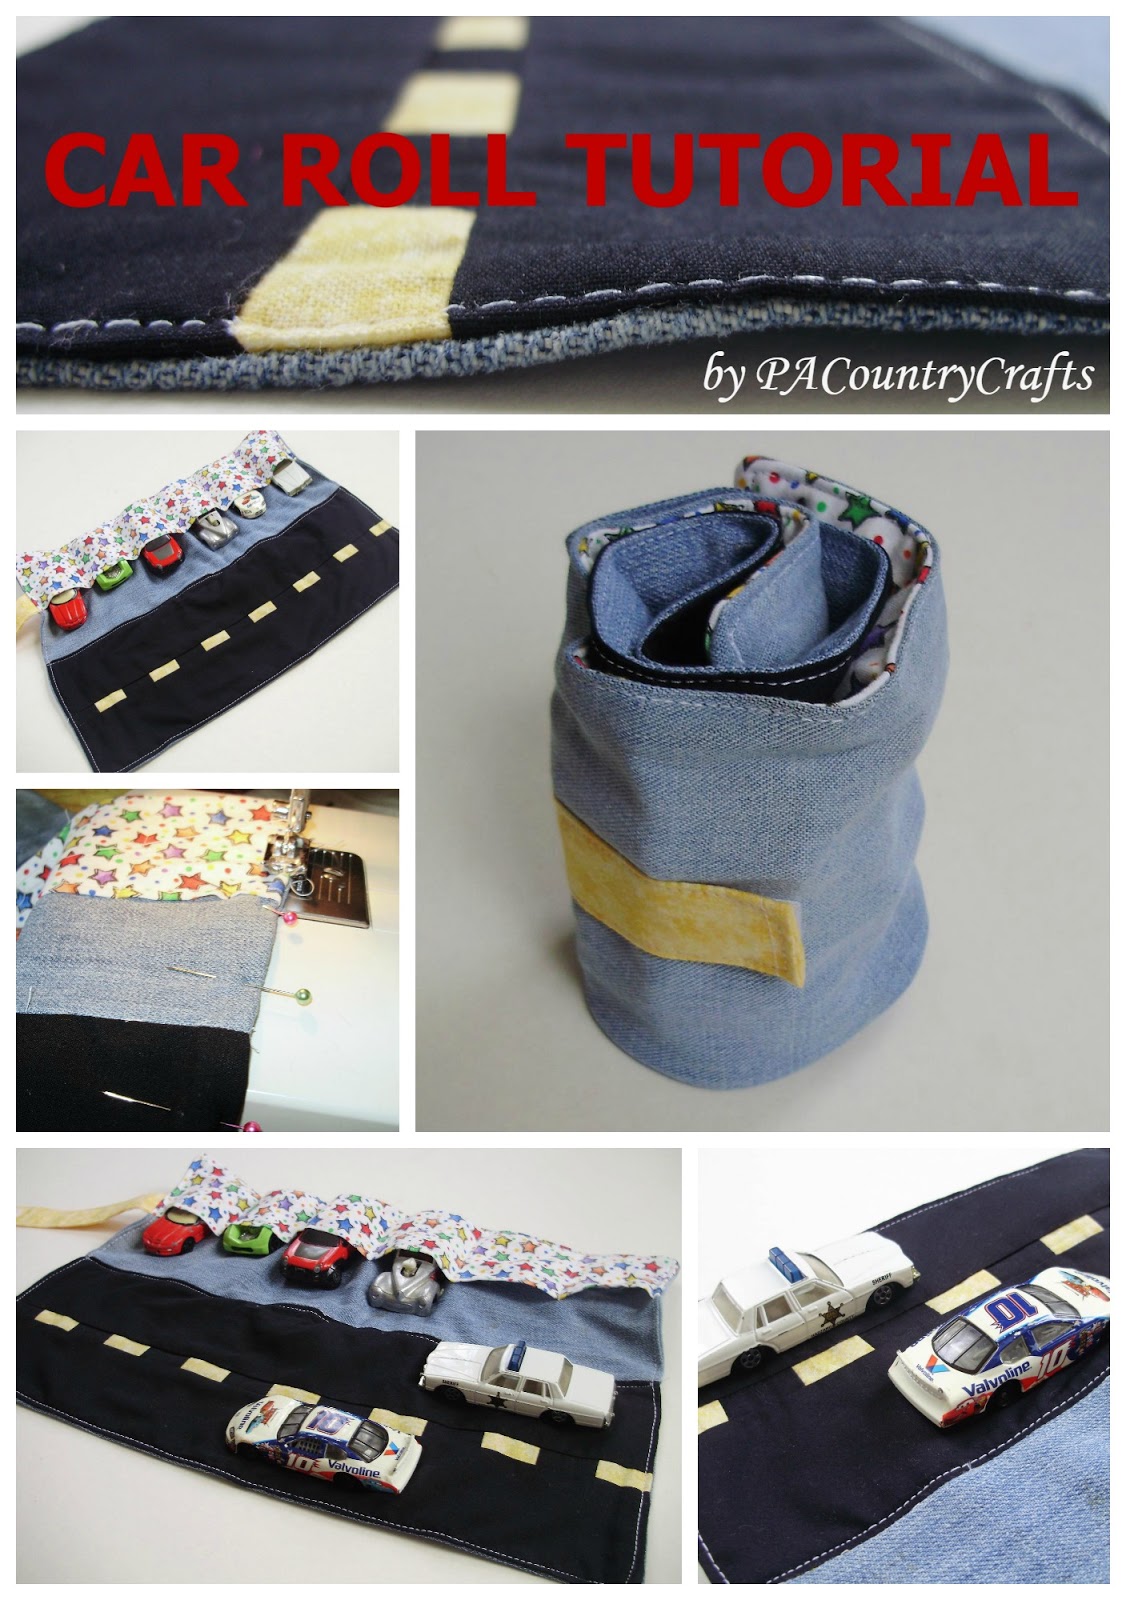
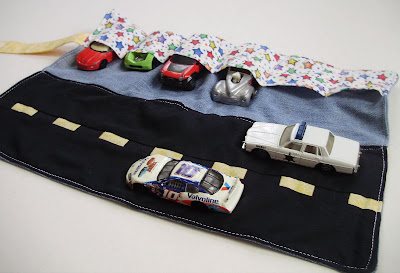 In my attempt to be the coolest aunt ever (I have 22 nieces and nephews so far!), I made this cute little car roll. It is made from some fabric I had on hand (it’s hard to find non-girly stuff in this family!) and some size 4T jeans that were headed for the garbage.
 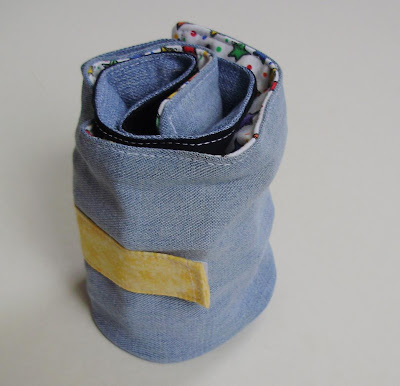 I was inspired by THIS tutorial, but I wanted to do a few things differently:
a) I don’t have duck cloth and I don’t know where to get it. Hence the denim.
b) Sewing on little bitty pieces of yellow felt didn’t sound like fun. So I channeled my inner quilter and made the road that way.
c) I rolled it instead of folding so I didn’t go all fancy on the outside and I skipped the stenciling cause I didn’t feel like it.
d) I made my own strap to velcro on from fabric.
 Look at that- a title photo just for this post! I am going all fancy here (OK, so I just got a cool close up and wanted to use it). I took the best pictures that I could get since PA is seeming more like Seattle these days. Of course, the sun came out when I was done, but I am not complaining ‘cause I missed it sooooo much! So forgive all of the poor quality pics. I tried.
Materials:
Black cotton
Yellow cotton
Any cotton for the pocket
1 ½ legs from an old pair of kids’ jeans
3/4" piece of Velcro
Thread
Part 1: The Road
Do all the cutting first and get it out of the way. You will need 2 pieces of black cotton measuring 2 3/4" by 14" for the "lanes" and for the "dashes" in the middle, you will need one piece EACH of black and yellow measuring 1 1/2" by 14". Sew the 2 small strips of black and yellow together lengthwise, then cut into 1" strips.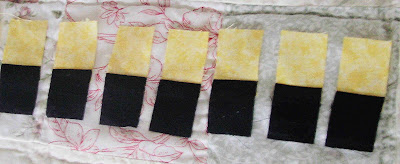 Sew them all short ends together, alternating yellow and black.
 Then sew this row between the strips and press towards the "lanes" and you are all done with the road! EASY!
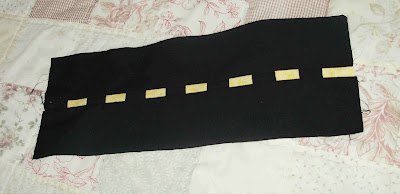
Part 2: The Velcro Strip
You will need a piece of cotton measuring 4" by 6" ( I just used yellow cause it was already 4" wide). Lots of ironing here- press in half lengthwise, open, and then press the edges in toward the center. Open it all up, hem in the end 1/4", and then sew your loopy velcro on one side just after the hem so the little box will be hidden.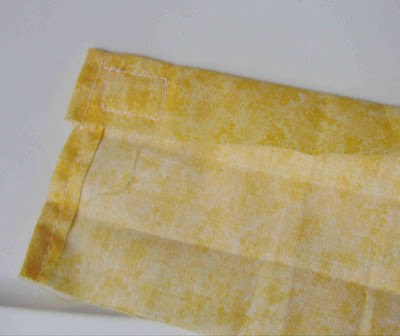 Fold the sides toward the center...
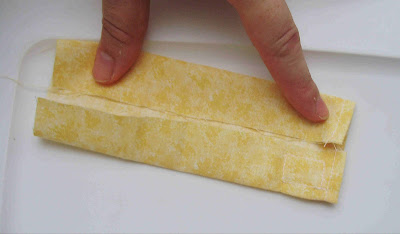 ...and press it half.
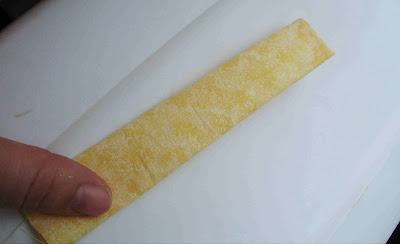 Then topstich around three sides, leaving the non-velcro side alone.
 See? No box on the other side.
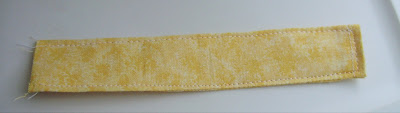
Part 3: The Pockets
Now we are getting into the denim. Cut one piece from the pants 14" by 5 1/2" and from your other cotton cut a piece 14" by 6". Press the cotton in half, wrong sides together, and sew the raw bottom edges of the denim and cotton together (Good way to cover up a few stains here!)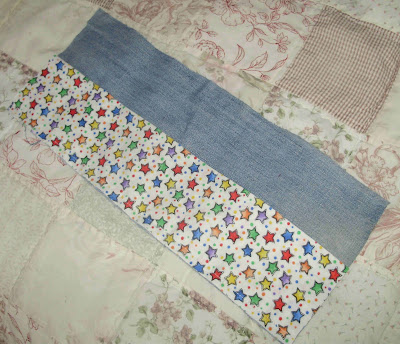 Topstitch the folded edge of the cotton just to keep it in place better.
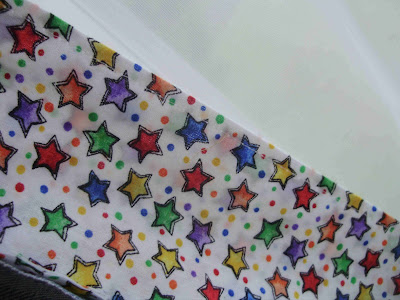 Then sew lines for pockets - mine were at about the the following intervals: 2 5/8", 4 7/8", 7", 9 1/8", and 11 1/4"
Part 4: The Outside
Take the remaining 2 pieces of denim, cut them to 14" by 5.5", and sew them together lengthwise and press the seams open.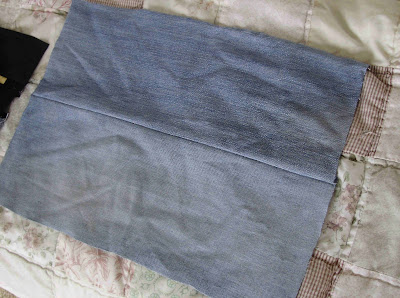 Sew the fuzzy piece of velcro on at 6" from the left end of the bottom piece and about 2 1/2" from the bottom edge.
Part 5: Assembly
Sew the two inside pieces together. Sew the raw-edge end of the velcro strip to the bottom, velcro up, lined up with the edge of the pocket. Go over it a bajillion times.
Sew the outside and inside together, right sides together, leaving the non-velcro end open, and flip (push those corners out real good!)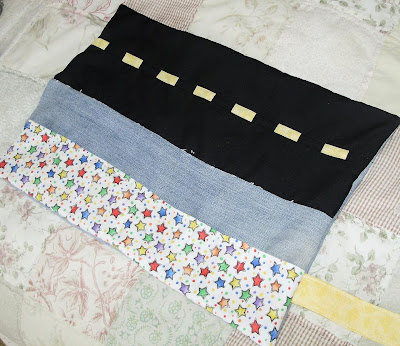 Fold the opening edges in and topstitch the whole way around and down the middle, too.
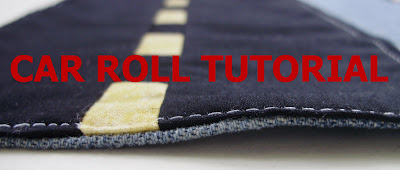
 I used white thread cause I didn't feel like changing it, but I like it! It's kind of like road edges.
Part 6: PLAY!
I was so disappointed that I could only find Sheriff Rosco's car and not the General Lee. :( But Rosco always loses! 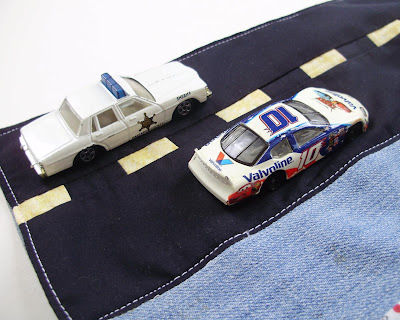 Fold.
Fold.  And roll. Secure with velcro.
  Perfect to tuck away in Mom's purse or a backpack!
Sewing, crafts, tutorials, recipes, and a little look at our life in the country - raising half a dozen children.

Hi! Thanks so much for stopping by! My name is Lindsay and on this blog you will find sewing, crafts, decorating, recipes, and tutorials with a little bit of honesty and encouragement.